Disclaimer: If you find an error, or feel like you have more up-to-date or relevant information, please let us know. We’re able to update our current material after the fact, create addendums, and generally revise our process for greater accuracy and effectiveness, so don’t hesitate to tell us.
Written by: Inso
Pros
– Consistent corner carry
– Heavy pressure
– Good reward off throws
– Quick walk speed
Cons
– Poor range
– No real oki without spending meter
– Has trouble closing the gap
– Inconsistent defensive options
Overview
Kung fu china girl! Her game plan is simple: take the opponent to the corner and harass him there until he dies, and while she lacks in other aspects she has the tools to do just that. Like any close range fighter stereotype she struggles in neutral and needs to approach patiently.
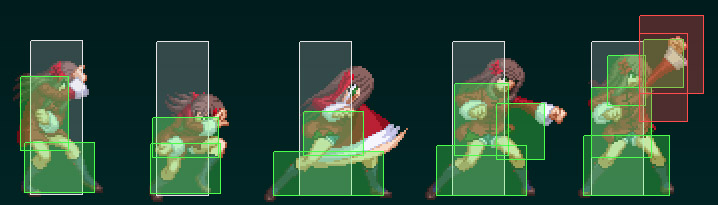
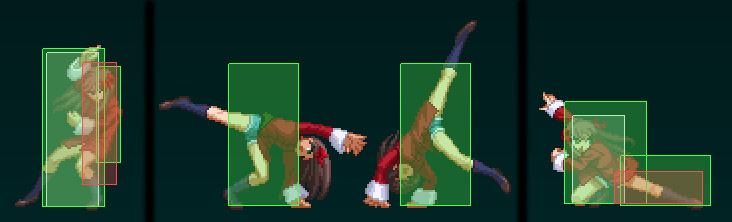
Normals
2A
Decent range for a 4 frame startup low.

5A
A reliable close range poke, as fast as 2A and hits most if not all crouchers.

2B
Upwards punch that moves her slightly forward, can catch people jumping and works as a solid anti air if properly spaced. In addition, the clash activates just before the attack which can be useful when dealing with some reversals and even heat.


5B
A forward stepping elbow attack, slightly positive on block so a good move to end blockstrings with and since it is pretty fast (6 frames) going for another 5B after that is a frametrap in itself. One of her best combo starters.

6B
A dashing attack, has clash frames when becomes active but the slow startup makes it hard to take advantage of. If used in tandem with dash momentum can reach really far, but the long recovery and ridiculous damage proration spoil the move’s risk/reward. Abuse it in pressure but keep it out of combos whenever possible.

5C
Very manly full body blow. Known to deflect blazing volleyballs. Another normal that moves her forward suited for blockstrings but the pushback is also high and results may vary depending on how late you cancel it. Not the fastest move for the job but can be used to catch jumps or people dilly dallying in the air. When hitting airborne opponents it sends them flying towards the wall and wallbounces if they hit the corner. If fully charged becomes an overhead that blows the opponent away on hit while only being cancelable into specials on both hit or block.

2C
A 6 frame startup sweep and one of her longest reaching normals makes this move her overall best option for poking out of pressure, but not abusable due to its limited reach and long recovery on whiff. Also not recommended for blockstrings because it has humongous pushback.

6C
Her dedicated launcher, a move you won’t use much because of the high damage prorate and inability to reverse beat or even special cancel on block. Due to Miyako’s low profile during the animation it can be used to anti air but results may vary.
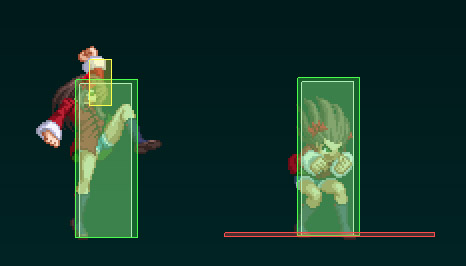
j.A
Fast close range poke, by far her weakest air normal but does its job in a pinch.
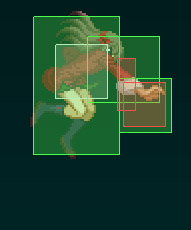
j.B
It used to be a complete monster and eventually got nerfed but is still powerful and versatile due to its speed, attack duration, shrunk hurtbox and cross up potential, contesting a large part of the space around her. Against grounded opponents it will only hit cross up when used close and low enough, otherwise it will miss or be avoided by crouching.


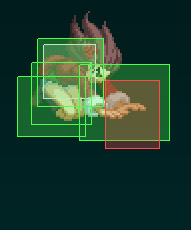
j.C
Her best normal to use advancing since it is active the longest, and also her standard air-to-ground option.
Specials
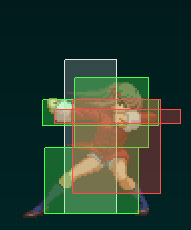
236A/B/C (Choushinchuu)
A forward lunge followed by an elbow attack, probably inspired by Guilty Gear Jam’s puffball. The A version slides forward a little and hits fast, is mostly used for combos but since on counter hit it can lead to a meterless full combo, using it for frametrapping is an option as well.
The B version moves farther and if you are close enough to an opponent away from the corner, she will cross him up before attacking, being one of her most basic mixups tools. It can also be used to catch people that like to backdash out of your pressure midscreen. Other than that, it is somewhat telegraphed and doesn’t have any special properties to avoid getting hit so I don’t advise using it as a gap closer unless you have a read on the opponent. Both regular versions have follow-up moves and are EX cancelable.
EX Choushinchuu used to have some invincibility, but that time is gone. It does however cover a large portion of the screen and is air unblockable and safe on block, so it can be used to call out some of the opponent’s actions from afar on neutral. On hit, it will send the opponent flying towards the wall and is completely untechable until he touches the ground, being your guaranteed corner carry tool in combos. Can OTG some characters.


Follow-ups (6A/B/C)
The A follow-up is a body blow attack with similar animation to 5C, useful for hitconfirming regular hit Choushinchuu or to frametrap further if it was blocked. EX cancelable, it can also be charged partially to delay the attack or fully to gain jump cancel property and extend pressure from a point where she had no more options left. On air hit causes wallbounce.
The B follow-up is in essence a dodge, by taking advantage of the opponent’s hesitation due to the threat of attacks after blocking Choushinchuu, she can choose to use the dodge follow-up and reset pressure with 5A or go for a tick throw. Or maybe if you are lucky the opponent will whiff an attack and get punished. Other possible applications could be avoiding retaliation reacting after a Choushinchuu gets shielded, or simply advance evading attacks if for whatever reason you are using Choushinchuu to move around.
The C follow-up is a sweep that grants hard knockdown and is less negative on block compared to the A follow-up. Also works for frametrapping or calling out standing shields. Cannot be EX canceled.
214A/B/C (Zenshippo)
Leaping gut punch. The A versions is fast, causes wallbounce on air hit and is mostly a combo tool. On regular ground hit it doesn’t lead to a combo unless EX canceled, but on counter hit it floats the opponent in the air leading to a combo opportunity, meaning it could be used for frametrapping but it’s questionable because unlike Choushinchuu there is no way to extend pressure after it gets blocked. Can be charged to become an overhead, as an overhead it sends the opponent flying towards the wall on hit and wallbounces if he reaches the wall.
The B version is slower and has a rare property in Melty Blood, she is considered off the ground and has feet invulnerability for a short period in the middle of the attack’s animation up until 1 frame before it hits, meaning that with proper timing it can go through some character’s low attacks while also cleanly beating throw or throw techs. Similarly to Choushinchuu B, it can also be used to catch people backdashing out of pressure midscreen, with the advantage of not requiring meter to confirm a long combo since it always floats the opponent on ground or air hit. Can be charged to become an overhead.
The EX Version is used mostly in combos after Choushinchuu. One of the few supers that has pre-super flash invincibility frames but a rather unreliable reversal because it is slow and invincibility doesn’t last all the way. Safe on block. It can beat H-moon shield counters when buffered behind an attack. Wallbounces on hit and can OTG.


22A/B/C
She stomps the ground and creates a shockwave, mostly used in blockstrings because has none or negligible push back. Invincible just on the first frame and clash starting from the second, the A stomp can be used for some option selects. It has a weird gimmick of being positive on block if blocked crouching but negative if blocked standing, nets a knockdown on normal hit and a combo on counter hit. The B stomp actually hits low and can be mixed in to catch people trying to stand block but despite having more range is much slower and can be jumped or interrupted. Also has clash that starts on the third frame and last longer, but is harder to properly use in part because it lacks the invincibility A version has. It always launches the opponent on hit and is neutral on block.
The EX stomp is fully invincibile and reaches until about 70% of the screen. Its problem lies with the fact that you can easily jump or shield to punish it. It is safe if blocked. Relaunches on OTG.

j.22A/B/C
Air stomp is generally used to change her air momentum, but should not be overused because it leaves her vulnerable until touching the ground. If used instantly after leaving the ground can pass as a regular jump to bait anti air shields. All versions are slightly positive on block and can be blocked in any direction in case of cross up. Regular versions can be comboed from on hit by linking a 5A.
The EX version is actually a low, gives hard knockdown on air hit being your only choice for maintaining pressure at the end of air combos. It moves Miyako during the superflash which strangely enough can make it easier for her to get hit out of it, also the hitbox misses somewhat easily on a few characters so be careful about the height when using it in combos. Its knockdown barely gives you time to get a jump in before most characters can act so be careful what you go for after it.
623A/B/C Renkantai
Jumping kicks style Dragon Punch. The A version is the regular invincible DP, but it has weaknesses: losing upper invincibility as it becomes active, short period of invincibility (trading even with some weak attacks), poor range and being airborne in a trade (most of the time coming out at disadvantage). So in short, it’s a reversal that needs a good read on which attack at which time the opponent is going for to work properly. The last hit can be EX canceled if it connects.
The B version is actually a short dash followed by an overhead, being another one of her basic mixup tools. It is not easy to spot if used at ambiguous moments but does low damage compared to the rest of her options.
EX Renkantai is her only reliable reversal, comes out fast and is fully invincible. It does OTG but unless done early and close it’s likely to miss altogether, so it’s best to use it after hitting a knocked down opponent with normals first. It’s last attack can be normal or jump canceled on hit, or if the opponent stands to block it Miyako can cancel into a normal and becomes safe.


j.623A/B/C
Air Renkantai is used basically for combos. The EX version is the only one with invincibility, but its main purpose is to kill at the end of air combos because of the extra damage. The A version is EX cancelable both on hit or whiff, you’ll only want to use it on whiff along with air EX Stomp to get out of bad positions. In combos the reason to use it is you might want the extra meter before canceling into air EX stomp.
Arc Drive (41236C)
A completely invincible slow stomp that creates a huge energy shockwave around her, the attack is air unblockable and unshieldable. Very punishable on block, lands decent damage by itself or as a combo ender. On hit, shoots the opponent into the sky and as he falls a huge cloud of dust arises, allowing for some hard-to-see shenanigans. Crescent moon is the only one that has the meter to abuse this on a regular basis.

Neutral
While short in range she has attacks that are fairly active thus giving best results when moving and attacking at the same time, examples being superjump C or using dash momentum to attack sliding, executed by canceling her ground dash with a normal as fast as possible. I recommend practising it because the timing isn’t trivial and it’s important for offense as well. Staying on the ground and using her walk speed to move around while analyzing the opponent is generally a good idea. Since her movement options are fairly linear, you may need to change things up and move predictively to avoid being zeroed in by more mobile characters, [neutral jump > influence falling momentum] to avoid ground approaches, [jump back > falling j.C] to protect your space or [forward jump > j.A] to intercept air approaches. You could even try a sliding attack, 236A ou 214A to predict and cut the opponent’s advances as a sort of footsies on the ground if you are feeling brave. [Superjump > neutral jump] is a way to quickly reposition yourself.
Offense
Since she has very versatile pressure forcing the opponent to respect shouldn’t be too hard, which in turn opens them to pressure resets with dash or jump, mixing up with tick throws, overheads or [half charge 5C > 2A]. Her throw being comboable is very significant not only for the extra damage but for the meter gain. Meter management is especially important because ending combos in air throw doesn’t do much for her even in the corner, so having meter when you need to optimize confirms into corner carry, damage and oki is vital.
Ending combos in air throw
You get nothing midscreen and it is basically a return to neutral. In the corner, the lower you are at the end of the combo the closer you’ll be when they touch the ground and the more advantage you’ll have. In a perfect situation, you can start walking forward and stop to punish a ground tech away from the corner on reaction. If he neutral techs you need to go for a read, press a fast button to counter his or a slower button to catch a jump. If he doesn’t tech, you can get closer for a meaty. Instead of walking, a read with 2C will OTG if he did nothing, miss if he techs away from the corner and may or may not punish neutral tech depending on the advantage you had, if it doesn’t punish in time you are susceptible to shield or reversal. Another alternative is buffering a dash as you touch the ground, if they did nothing you are in a good position, if they tech away from the corner it will autocorrect and you’ll still be on top of them, in case they tech neutral, jumping or throwing are your best options since you’ll be at a slight disadvantage.
Defense
Despite having a colorful set of reversals and defensive options even outside of shield, I believe this is one of her problematic areas. Miyako arguably has the worst shield bunker in the game, losing to many multi hit moves even when correctly timed. Her dodge is one of the few that moves forward, which is good for getting out of some situations, but it has the longest animation out of any of them and is definitely not a guaranteed disengage. Mashing out of pressure is also challenging due to her range.Take your time learning which options are good in which situations.
Combos
AT = air throw basic combo ender
sdj = super double jump
(X) = optional X
[…] = anything that doesn’t get in the way of what comes next
Ender = I advise always using sdj when going for Air EX Stomp so it won’t miss any characters on the way down.
bnb midscreen – meterless
2A 5B 2B 5C 2C 5AA j.ABC sdj.ABC airdash AT
Corner carry – meterless, works from around center midscreen position, variations are char dependant
2A […] 2C short delay 5C 236A~6A [8] j.ACB dj.BC Ender
2A […] 2C 5C 2C 236A~6A j.ACB dj.BC Ender
Corner carry – any position, universal
2A […] 2C 5C delayed 236C (dash 214B) 5B 2B j.ACB dj.BC Ender
From air counter hit or 22B
dash 5B 2B > air combo
Raw air throw
I) 5B 2B > air combo
II) Lowest possible 5B 5C short delay 5A 2B j.CB sdj.ABC Ender
III) Lowest possible 5B 5C short delay 5A 2B j.C airdash j.AB sdj.AC Ender
IV) fastest possible 5C 5A 5B 2B j.ABC dj.BC Ender
Notes: variations I and II work on most characters, variation III is harder but more consistent against characters with smaller or weird hurtboxes, variation IV is for when the throw was so high you get too far off for 5B.
In the corner – meterless
2A […] 5C 2C 214A walk back 5B 2B j.BC dj.BC Ender
In the corner – damage, char dependant variations
I) […] 5B 2B 5C 214C lowest possible 5C 214[B] lowest possible 5B 5C > air combo
II) […] 5B 2B 5C 214C lowest possible 5C 214[B] walk back 5B 2B > air combo
III) […] 5B 2B 5C 214C lowest possible TK j.623C 5A (5B) 2B j.BC sdj.BC j.623A j.623C
Note: opponent must be pressed against the corner when 214C hits. Variations I and II only add about 500 more damage than regular corner combo, so only worth it when going for a kill or preferably when you got a good starter and wants to teach the guy what pain is. Variation II is for characters like Aoko and Nanaya that for some reason get crossed under after 214B and require walking back under to be in the corner again. Variation III is the highest damage I could find for basically all of your meter.
623B starter
whiff cancel air throw > 2B > air combo
5[C] starter – midscreen
delayed 236C (dash 214B) 5B 2B > air combo
236A~6A > air combo
5[C]starter – corner
link 5A 5C > air combo
From a ground throw (universal corner carry)
5C (*) 5B 2C 214A 236C (dash 214B) 5B 2B > air combo
* Or any variation you’ve learned so far considering positioning/resources. [Throw > 5C ] has specific and tight cancel window, practice makes perfect. On limited characters you can [throw > 5B] instead and you can go for [5B 6B 2B > etc] for more meter gain in exchange for a little less damage.
