Disclaimer: If you find an error, or feel like you have more up-to-date or relevant information, please let us know. We’re able to update our current material after the fact, create addendums, and generally revise our process for greater accuracy and effectiveness, so don’t hesitate to tell us.
Written by: Inso
Hitboxes by: heavymetalmixer
Pros
– Well balanced fighter
– Good damage
– Solid normals
Cons
– Not very mobile
– Has trouble staying close in pressure
Overview
This is one of the standard prototype characters of Melty. He can be hard to master or complex if you’re trying to play him optimally but he definitely rewards you for your understanding of fundamentals. I’d recommend him if you have the patience to learn the ins and outs, but not if you just want to press buttons and get results fast.
He handles most situations well, and like traditional Melty characters he plays a more cautious space controlling game with his normals, trying to hit the opponent or make him block something that will give him the upper hand.
Proficient players: the C-Shiki gods have been inactive for some time unfortunately, T.I and Shikki are the ones that retired long ago, the new face and most recently seen active is Narusora. You can look up their videos in Melty DB.
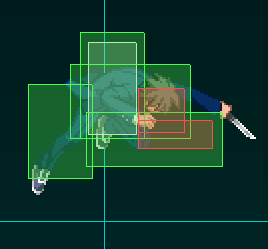
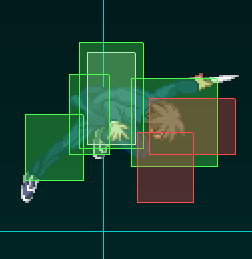
Normals
2A
Decent close range poke. Doesn’t have good frame advantage on block, but that doesn’t matter much since you can rapid fire and stagger.
5A
Might look like a low, but hits mid. Shorter range than 2A so you’ll want to use it mainly for whiff canceling.
2B
Two close range hits: the first hit is a low; the second hit trips crouchers mid combo despite being a mid, and has clash frames in activation.

5B
Good startup, situational anti air. Its clash frames start just before activation, and it is barely negative on block.

5BB
The launcher follow up to 5B, has a lot of untechable time even allowing rejump combos. If canceled into neutral jump on hit will go into a high jump. Turns into an overhead if charged all the way, but isn’t enough to trick anyone by itself. On block, can be cancelled only into specials.
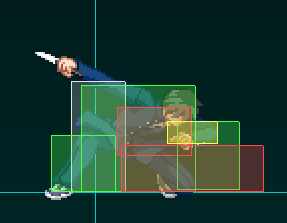
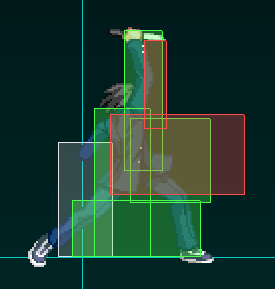
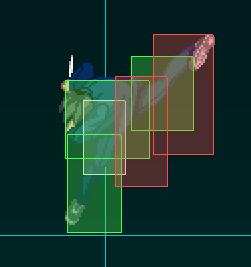
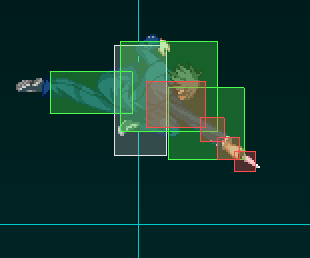
![6[B]](https://drunkardshade.com/wp-content/uploads/2015/12/6b1.png)
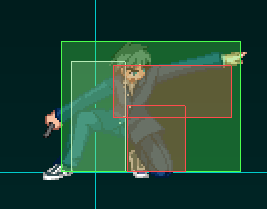
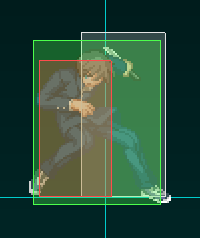
6B
Moves him forward a little, clash frames start before activation. If charged fully, loses the clash but turns into an overhead. When blocked can only be cancelled into specials, barely negative on block, charged or not.
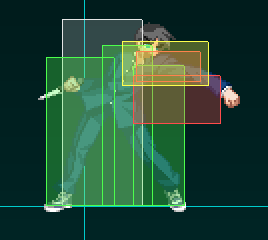
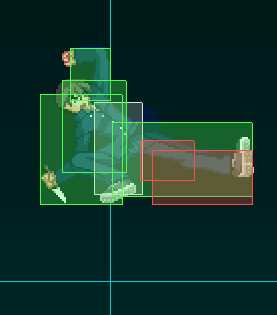
2C
Fast and broad sweep, but a lot of recovery on whiff so use it wisely. Prorate is a bitch. On counter hit, you have enough time to whiff cancel 5A then 2C again or even dash 2A 5B to confirm a combo.
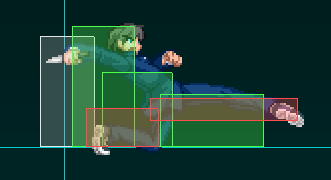
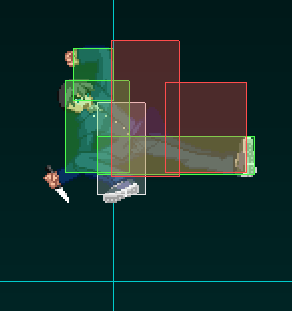
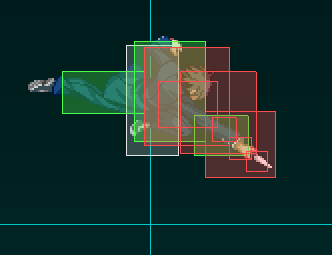
![5[C]](https://drunkardshade.com/wp-content/uploads/2015/12/5c1.png)
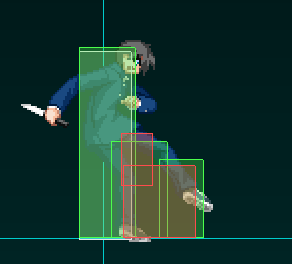
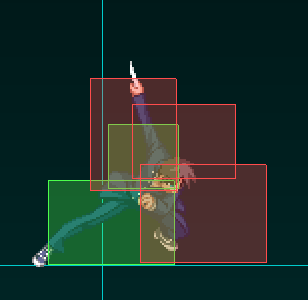
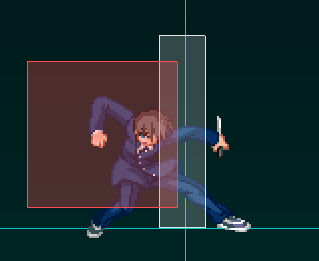
5C
Forward moving stab, best reach but also a lot of recovery on whiff, chargeable to a very slow unblockable. It’s important to remember the unblockable doesn’t last the whole 5C animation, the move will still hit on it’s last active frames but won’t be unblockable anymore, in which case it can be punished.
j.A
Fast air poke, great for challenging in the air when you get close enough.
j.B
Knife slash with two hits, can only be cancelled on the second hit. A really good air to ground normal, best done close to the ground. When going for IAD j.B always jump backwards because otherwise if they are crouching you might go over them or only one of the hits might connect, messing up your hit confirming.
j.C
Heel kick with a really good reach.
j.[C]
Basically the same kick, except it will send the opponent to the ground on air hit. If it hits a grounded opponent it will launch him into the air because fuck physics.
Specials

236A/B/C
The A version is a short dash with an upwards slash, can work as a punish tool, anti air and anti-jump, but the B version is a better option as anti-jump because it leads to damage meterless. The B version has a longer dash and hits twice, can be delayed by holding down the button and if you hold for long he cancels the attack.
The EX version is almost instant, 0 block, gives a hard knockdown on hit and can OTG.
214A/B/C
A really down to the ground slide that can low profile, hits low and gives hard knockdown on hit. The A version is fast but is generally punishable on block, while the B version comes out slower but is safe and has a follow up launcher for hit confirming. The EX version has some invincibility, is all cancelable on hit and can OTG, but is very unsafe on block.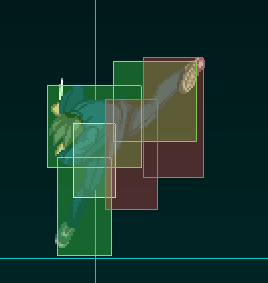
623A/B/C
His invincible Dragon Punch series, only the very first active frames are air unblockable. By the time it goes active the A version holds only low body invincibility, while The B version holds only upper body invincibility but has a better hitbox. Given that, those DPs are very likely to trade in Shiki’s favor unless the opponent can counter them through safe play. The A version is EX cancelable.
The EX version comes out a little slower but has much more invincibility and can OTG. All versions have a follow up downwards kick that comes out when you press a button while in the air or hold the same button used to do the move. This follow up can be somewhat delayed to create a mind game, but either way it can be avoided by crouching. If the follow up hits or gets blocked, Shiki is safe.
All DPs have an air version but only the EX air DP has invincibility, which doesn’t mean much since the point of using it is getting more damage at the end of a combo than a regular air throw ender.
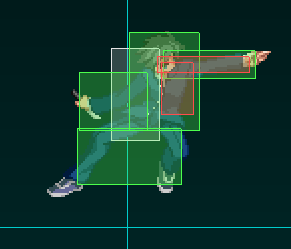
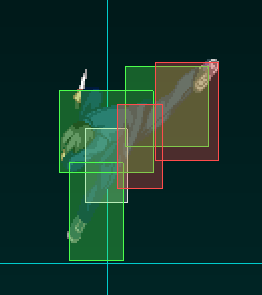
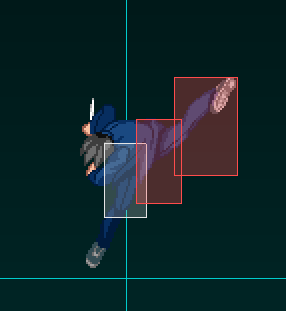
![22[A]](https://drunkardshade.com/wp-content/uploads/2015/12/22a.png)
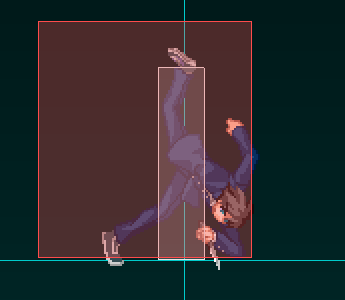
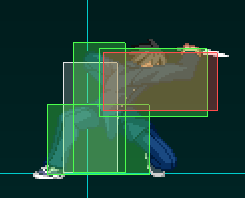
22A/B/C/D
Teleport based series, each move with a very different purpose. The A version is a flying kick that wall bounces on hit, becomes an overhead if charged fully but is unsafe on block if done too close.
The B version is a teleport with a few intricacies, it travels a fixed distance but at any moment after startup you can press D to stop the movement with very short recovery. This allows you to play mind games or a which side mix up upon setups with knockdown. Also, if you hold the B button when you do the move, the teleport goes farther.
The C version is a command grab from an initial teleport. Shiki disappears and reappears at the opponent’s back, and then grabs and slams him on the ground, leading to a combo opportunity. Since Shiki needs to cross up to activate the command throw this move won’t work after pushing the opponent against the corner. Easy to react to unless done point blank. It has a small clash hitbox just before grabbing but it is inconsequential as anytime something hits that hitbox but not Shiki he is most likely going to grab nothing but air.
The D version goes into the teleport stance but does nothing and stays in place, great for fainting one of the other moves and observing how the opponent reacts.

j.22A/B/C
Yes, a knife divekick(?)! The A version starts descending right away, very useful to stop his momentum and disrupt anti air or EX shield attempts. The B version has a longer delay, but actually hits overhead. Both versions can be cancelled into specials when landing.
The EX version is overpowered, completely invincible after the superflash and can even be positive on block depending on how it connects. Leads to a short combo in case it hits on the ground and can OTG.
Arc Drive
Gimmicky unblockable. Creates a “bullet time” style slowdown while Shiki leaps forward. After a few frames of startup, the hitbox activates and if the opponent touches it he will get hit by the full screen slash. If it doesn’t hit after a while, it loses its unblockable property and can be blocked (and punished). The unblockable can be avoided in many ways and doesn’t do much damage, so you’ll rarely want to use it.
The Another Arc Drive is similar, but does more damage and the unblockable part starts much sooner albeit still not instant so equally avoidable. It doesn’t last nearly as long as the regular version. Both version are punishable when they miss.
Last Arc
A counter attack slash that deals more damage the more meter you have, while inflicting circuit brake and depleting the opponent’s meter.
Neutral
Your best approach when chasing is being patient and working your way around the edges since Shiki can’t cover large distances fast, but if you need to, the best thing you can do is dash > IAD and you will be about half screen closer to your target. His step dash allows him to close in short gaps in an instant, so dash > 2C is the best “long range poke” you have, and your opponent should feel especially uncomfortable staying in dash > 2A range.
While fighting for dominance in the air, your j.A is great for challenging people above you, and superjump j.A can catch people by surprise and interrupt a lot of stuff when properly spaced. On the other hand, casually throwing out j.C while holding your ground is good for stopping approaches, and it is overall a solid air to ground normal too. 236A can score counter hits as anti air, or at least trade in your favor, but you have to use it pre emptively.
Offense
Aside from the basics of Melty pressure such as staggers and whiff canceling, C-Shiki’s pressure stands on three pillars: corner, fear of 2C, anti-jump.
His pressure isn’t easy to maintain as you can’t rely solely on your normals to keep you close, thus having to re approach often, and that is why the corner is so important to mitigate pushback and limit the opponent’s escape options.
The second important pillar is realizing threat of 2C (and being in its range) is what keeps the opponent blocking low, so using it early in a blockstring is generally a bad idea, also because it is the move that pushes you back the most on block.
The last pillar is being able to read at which distances the opponent will try to jump out of the corner. To punish jumps you have dash > 2A > 5B, 22A and 236B, the last two conveniently work just outside of 2C range.
If you can identify and punish properly when the opponent fails to respect any of those pillars you establish the character’s real pressure and can get away with more pressure resets and mind games like 22D and 236[B].
Now talking okizeme, he doesn’t get much from ending combos in air throw, threat of meaty 2C will make most players respect a dash > 2A that may or may not be faster than the button they press. It’s possible to get better okizeme by spending meter or cutting combos short, to know more read the combo section at the end.
He has several ways to go through defense, 6[B] being his main overhead. As a counterpart to that, you could use half charge 6B > 214A but since that is unsafe on block and requires meter to confirm I think best to use half charge 5C 2B instead. Although a much more situational overhead, j.22B can also work after a deep j.B. There are other examples like j.C > airdash > j.B, high j.C j.B(1) double overhead, IAD j.C-whiff 2B, the list goes on. Anything can work as long as you understand or condition the opponent’s blocking pattern.
Defense
His backdash is a really good escape tool, and he is one of only two characters that has access to a second backdash as a follow up to the first that makes him retreat even farther. 2A and 2C are good buttons to catch opponents amidst gaps in their pressure, and 5B could stop close range IAD attempts. His DP can be troublesome to deal with since it often trades in his favor and has a follow up that can disrupt punish timings, plus 623A can be EX cancelled into 236C which makes it safe.
Bread and Butter Combos
AT = air throw basic combo ender
2B(1) = only one hit of 2B
dj = double jump
[…] = anything that doesn’t get in the way of what comes next
midscreen – damage
2A […] 2C *delayed 6B rising j.B j.22C superjump j.CB dj.BC AT
*or no delay 6B rising j.C if too far
midscreen – damage meterless
2A […] 2C 6B 5BB j.BC dj.BC AT
midscreen – oki
2A […] 5C 236A 236C
midscreen – oki meterless
2A […] 2C 5BB 9 j.[C]
midscreen – corner carry
2A […] 2C 6B 5BB delayed 9 j[C] *2A 214C 214A-whiff j.AB dj.BC AT
* really hard character/gravity dependant timing, you have to adjust delay in the jump and/or j.[C]. Alternatively you can go for OTG 214C after j.[C] which is much much easier.
midscreen – OTG (from a random 2C or 214A)
– point blank 214C 5B j.BC dj.BC AT
– 2AAA 2C 236C
corner – oki
[…] 5C 2C 214C 5A-whiff 5B-whiff 5[B] 22D 2C 5BB 9 j.[C] j.22A 623[B]
corner – damage
[…] 5C 2C 214C 5A-whiff 5B-whiff 5[B] 22D 2C delayed 2B(1) 5BB delayed 9 j.[C] *5A 2C delayed 6B 2B(1) 5BB 2A-whiff j.BC dj.BC AT
* easier variation: 2A 5BB 5A-whiff air combo. This route doesn’t add significantly more damage than the oki version compared to how much harder it is, so unless you are going for a kill and are confident in your execution I don’t recommend it.
corner or near corner – damage meterless
2AA 5B 5C 2C delayed 6B 22A 8 j.ABC dj.BC AT
* 22A will connect after 6B in most characters only after a certain amount of hits due gravity
corner – 236B air hit combo
j.ABC dj.BC AT
corner – OTG (from a random 2C or 214A)
dash 5AAA 5B 2C 214C 22D -> oki or damage ender
dash 5AAA 5B 2C 214C 236[B] -> oki or damage ender
corner – j.22B starter
236A 214C 236[B] dash under 2C > whatever you feel comfortable with by now
Useful links
https://www.youtube.com/watch?v=6O9YB0o8U70 – Offensive Option Select
http://wiki.mizuumi.net/w/Melty_Blood/Shiki_Tohno/Crescent_Moon – More indepth guide
