Written by @Tsuntenshi
Proofreading and Polishing by @WafujiDaGod
Additional Help by @Gonococcus for the Akira overview.
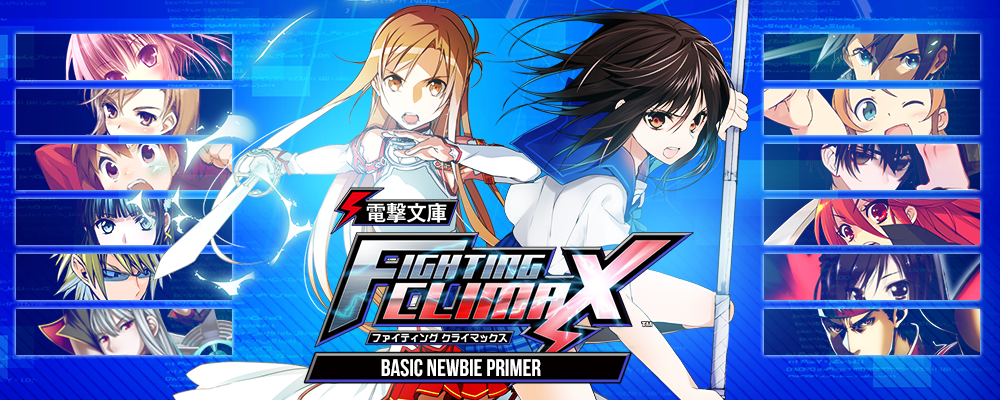
In anticipation of Dengeki Bunko FIGHTING CLIMAX (DFC) coming out to the US as well as Japan receiving a version update to Dengeki Bunko FIGHTING CLIMAX IGNITION (DFCI), here is a nice guide to get you started with the game.
How to play the game:
https://www.youtube.com/watch?v=6WobZzl6okQ
https://www.youtube.com/watch?v=HX5axLfgpUQ
Because the game lacks a tutorial mode which is common in most fighting games nowadays you will need to learn the game mechanics on your own. Use these videos to familiarize yourself with the game mechanics.
You can also refer to the Dengeki Bunko FIGHTING CLIMAX section on the Mizuuumi Wiki where it will also have indepth details on the characters, while some character pages are still lacking in guides it is still a valuable resource for frame data and other information.
dfc.mizuumi.net
Match Video Database:
This database will be your go to source for Japanese match footage as it contains uploads from the top arcades in Japan for DFC as well as top players for each character. If you need additional help check out the statistics page for notable names for each character to check out.
Flow of the Game/Use of the Mechanics and Resources:
Importance of Blast
In the game there are 3 types of blast as mentioned through the tutorial, one that notably stands out is the Power Up Blast. At the start of a match using Power Up Blast early can help you get your momentum going or at least allow you to build resources for the rest of the round while your blast gauge recharges. You gain a free bar of meter (2 if it hits your opponent), increase attack and defense and a short duration where your health and meter are in a state of constant regen. Power up Blast is also very viable as a wake up option as it is safe on block. While you aren’t at frame advantage after using it meaning you can’t go in mashing as you are technically -1 after a blocked power up blast you should be able to go into a blocking state immediately after your blast. Stronger players can read the wake up Power Up Blast and attempt to punish however it’s rare that players will make that hard read.
On the topic of blast, Combo Blast is very strong to close out rounds. Combo Blast works the same way as a One More Burst in Persona 4 Arena where it will launch them up in the air for you to extend your combo however a Combo Blast also gives you an additional bar of meter allowing you to end games with a strong super ender if you were in a scenario where you had only 1 bar of meter.
You should NEVER use Escape Blast unless you need to (if you’re about to lose a close round and you are confident in winning it or you are about to lose the match. Using Escape Blast significantly slows down the blast recharge and basically means you won’t be getting another blast to shift your momentum for a long time. It’s do or die after you Escape Blast.
EX Moves/ Climax Arts/ Special Arts
Following the topic of Power Up Blast and the meter gain from it we come to our next point which is the EX and Super moves of the game. These moves are a lot more important than simply ending a combo with more damage but they play a bigger part as well. First lets go over their inputs
EX: Special Move Input + AB (1 meter)
Special Art (or Ranbu): 63214+BC (2 meter)
Climax Art: 41236+BC (2 meter)
What many players made not know is that each one can have a significant influence to the game.
Each of your EX moves give you a 10% increase to your Blast recharge and your Ranbu super gives you 20%. These can be very useful tidbits to know as it allows you to speed up the process to go back into Power up Blast and its benefits. If you accidentally Escape Blast this will also help you close the gap with its slow recharge.
The main difference between Ranbu and Climax Art is the damage, invul properties and the position they set you up in. While Ranbu doesn’t do as much damage compared to Climax Art it gives you that 20% Blast recharge as mentioned earlier, it has full invul so it allows you punish whiffed moves with proper reaction and it puts you in a good position to set up oki. Climax Art is purely damage and don’t allow for the same oki positioning as your Ranbu.
Players will go half a round without even using their blast where in actuality they could have used power up blast, gotten their free meter gain and health regen and likely have it recharged in the time they went without using it at all through using it in combination with their stronger moves. Keep these quick tips in mind when playing.
Trump Card
As the name suggests, this mechanic is your “Trump Card”. You start each match with 2 trump cards which can be used at any time and when you lose a round you recover one trump card, with this in mind you also cannot have more than 2 trump cards so you want to at least use one if you are at a disadvantage.
Each character has a high damaging offensive trump or a “install” trump where they undergo an enhancement for a set period of time. Added to these benefits they also allow for free assist cancels which normally cost one bar of meter and to call your assist without the assist call animation, so motions like running up and calling your assist or super jumping forward and calling your assist become possible. Finally it adds the ability to reverse beat, for those who don’t know what that is it means to be able to cancel your normals into normals you couldn’t normally (i.e 5C > 5B) which helps for extended pressure, otg damage and combo extensions
Because of how powerful Trump cards are they can easily shift a games momentum, some players will throw it out early as a surprise factor however using it when you’re at a disadvantage or want to close out the round/match is the best way to utilize it.
In summary:
Power Up Blast Early > Use Ex/Ranbu Moves to speed up Blast Regain > Power Up Blast > Repeat
Use Trumps wisely
Character Breakdown
With only one character being the exception the game has a whole is pretty balanced, while there are “top tier” characters they aren’t too overbearing where they break the game. Every character has a chance at winning and in the end it’s how you play your character and play the game. The one character exception will be mentioned below as we go through a quick character summary breakdown.

Shana:
Shana shines in her ability to be overwhelming in offensive and having just about every tool you need in a character. She is one of the only characters with an air dash as well as an install trump card, she can perform high damaging converts off virtually any confirm and strong normals make her one of the best in the game. This game lacks anti-airs for most of the cast and Shana is one of few characters to have a reliable anti-air via her 5B.
It’s hard to say she has any real cons aside from maybe a weak 2AB for reversal options but even then most players get away with her Guren no Oodachi (214x) into a super or trump to make herself safe.
Video: https://www.youtube.com/watch?v=NsyGpiWuTbA&feature=youtu.be&t=27m41s

Asuna:
Asuna is a well-rounded character with good long normals even from her weaker normals such as 5A and 5B for pressure and consistent hard knockdown enders. She accels in poking the other character from a distance and using stagger pressure to opponent an opponent up. Added to all this she gets pretty high damage for little resources compared to the rest of the cast and a pretty good anti-air (2B) which is rare in this game.
Asuna is pretty straight-forward in design, if there is anything she lacks it would be a form of projectile. Asuna is also probably the best character to use to properly learn the game.
Video: https://www.youtube.com/watch?v=zuPB9AYv1zU&feature=youtu.be&t=0m06s

Mikoto Misaka:
Mikoto is one of the zoning characters in the game, needless to say she excels at a range. Thanks to her Magnetic Move (214x) she has a bit more flexibility in her mobility as being one of the only characters with an air dash along with Shana and others. With proper use of her charged normals such as j.C and 5C and 2C bundled with the proper assists she can lock players down and ultimately make players hang themselves trying to get in, more so if they’re unfamilar with the match up.
Mikoto however suffers from long recovery on her moves, if any of her zoning moves are whiffed due to mis-range it is practically a free punish for the opponent given that they react appropriately. Off regular confirms she also doesn’t do consistent damage and requires resources to make punishing plays. Her “reversal” option of 2AB is also one of the worst as it doesn’t work as an anti-air nor does it help against pressure.
Video: https://www.youtube.com/watch?v=qukk8oXzXUk&feature=youtu.be&t=6m39s

Kirino Kousaka:
Kirino is an offensive character with strong and fast normals, A notable normal of hers j.C has a hitbox that surrounds her completely. What primarily makes her shine is her Athlete Dash which is like a moving hitbox which leads into a free mix up. From this move you can make relatively high damaging conversions and stuff meterless reversal options clean. Her mobility is very fast and has an air-dash (don’t worry only 4 characters in total have an air dash lol)
Kirino at the highest level of play makes her arguably the best if not one of the best however she also requires a bit of execution at this level. While she lacks damaging confirms into a hard knockdown and ends most of her BnBs in the air shes very consistent in her play and can easily oppress a player with her pressure.
Video: https://www.youtube.com/watch?v=NsyGpiWuTbA&feature=youtu.be&t=33m50s

Shizuo Heiwaijima:
Shizuo is the only character in the cast to possess a command grab as well short strong combos and very long reaching normals. He is very basic in design, you could say he is the “grappler” character of the game.
The problem with Shizuo is that his design or intention doesn’t mix well in a game like DFC. His command grab doesn’t do a lot of damage and throws his opponent to the other side of the screen, not allowing him to set up any form of okizeme. His air confirms are very weak and can only truly be optimized with a handful of assist characters. His faster normals are too short and slow compared to the rest of the cast and lacks reliable reversal options to make up for it. He is also the only character in the cast to have a ranbu that isn’t invul but has guard point on the first hit which never works in his favor unfortunately. Overall he was not designed properly for the intended game and must work hard for his wins but to a point where it makes you wonder if it is really worth. I’m sorry but that is the cold hard truth, you have been warned.
Video: https://www.youtube.com/watch?v=gRuGohOYRY8&feature=youtu.be&t=12m49s

Kuroyukihime:
Kuroyukihime is one of the other zoners in the game next to Misaka. While Misaka has more consistency with her ranged tools she also has to be precise in range, Kuroyukihimes range is a bit wider and doesn’t require strict spacing in comparison. Compared to Misaka however her normals up close are much weaker but this gets made up for under her Red Mode Trump Card Install as it allows her to wall bounce her main zoning tool as well as increase the range to nearly full screen. Kuroyukihimes main move is Death by Piercing (236x) more than anything.
Under the right settings Kuroyukihime is very scary however she is easy to pressure up close which is where she truly lacks.
Video: https://www.youtube.com/watch?v=HMNrKOnhXoQ&feature=youtu.be&t=3m43s

Tomoka Minato:
Tomoka is one of the most enjoyable characters of the cast. She has various follow ups from her special moves which help her primarily for oki and in some cases your approach in neutral. While her normals aren’t too great her most notable ones are j.C and 2C. Tomoka is primarily known for her capability to setplay players with the right assist choice (Kino or Accelerator for example) and ultimately kill opponents from successfully 50/50 mix up.
The main issue with Tomoka is that she lacks a good anti air and has very short normals so she easily gets outranged in neutral. She also requires proper resource manage and timing to properly do her setplay.
Video: https://www.youtube.com/watch?v=qS8RlOKFUU8&feature=youtu.be&t=2m45s

Kirito:
Kirito is a solid character with pretty good normals however his true potential shines in his “dual-wield” mode via his install trump card ability. Kirito becomes one of the strongest if not the strongest character under dual-wield however it only lasts as long as the trump cards duration, players will utilize power up blast to extend this but it doesn’t last as long as you would want it to. Kirito can end games with 2-3 confirms under his duel-wield and apply tremendous pressure as well as the most potential for comeback wins.
The downside to Kirito is that outside of duel-wield he is very underwhelming, to play him you must have outstanding neutral for his normal mode as well as know when to properly utilize dual-wield.
Video: https://www.youtube.com/watch?v=mi6kr5Bcqvo&feature=youtu.be&t=15m20s

Miyuki Shiba:
Miyuki is the last of the “zoners” in the DFC cast. While Kuroyukihime accels in range, Misaka accels in consistency and angles, Miyuki accels in size. Miyuki has charged versions of her 2C and 5C which takes up a lot of horizontal and vertical space, on block she can special cancel these and go in for her mix up there. One of the biggest tools she has is her trump which tracks and is air unblockable which plays a huge part in the end game rounds. Miyuki also has the best mobility in the game, in combination with her air dash and air special moves she has alot of freedom of movement.
Miyuki on paper sounds wonderful however she is very execution heavy and even her most optimal routes don’t do a lot of damage for the work put in. She is easily pressured and lacks good normals to poke herself out.
Video: https://www.youtube.com/watch?v=qS8RlOKFUU8&feature=youtu.be&t=14m37s

Taiga Aisaka:
Taiga is a well rounded and honest character. She has solid normals, good combo options and can even convert some air combos into super. Her issue lies in that she lacks neutral tools, needs a proper assist to compensate and she has to spend a large amount of meter to do decent damage. To add to that she absolutely has to spend a bar for hard knockdown. While there isn’t much that makes her unique her tools are good. 2AB and 5[C] works as an anti-air in some cases. Her 5AB moves her forward and good for quick punishes from a distance. Her trump card can be used as an anti-air as it moves fullscreen. She has the ability to make most of her strings safe with sled which is only slightly minus.
Overall, while she is a solid character she’s just not as solid as the others above her. Everyone else excels in one area or more and does something better than she does.
Video: https://www.youtube.com/watch?v=tGiTabQ4YgA&feature=youtu.be&t=26m25s

Yukina Himeragi:
Yukina is a ranged character with is more focused on spacing and distanced pressure. Similar to Asuna she uses her long normals to apply pressure however she is not as fast as Asuna so she is much less aggressive in her approach and more so defensive. Yukina punishes overly aggressive opponents very well and has very strong conversions off ground and air trades. Something unique to Yukina is her potential, she prevents the opponent from push blocking which makes Yukinas pressure much scarier once you initial it (after using 3 ex moves). Combined with an assist like Kojou this makes her pressure and oki much scarier and allows her to start her offensive.
While Yukina does well to space out opponents she has trouble keeping them out, her 2AB reversal is very weak and slow on start-up so you have to play her patiently. Her damage also isn’t very consistent without spending a lot of resources.
Video: https://www.youtube.com/watch?v=YaiyM3dIMVI&feature=youtu.be&t=17m58s

Rentaro Satomi:
Rentaro is an aggressive character who excels in frame traps. His normals are fast as well as his special moves, in combination with his Homura Kasen (214a) he can continue to apply pressure with ease. Once he has conditioned an opponent to fear his pressure he can start going into his mix up options which are 214B and 214C. The three special moves listed above can all be charged and make each move plus on block allowing him to continue to apply pressure. At a distance he can also use his Gunfire (236x) to apply pressure at a distance and mix up an opponent as the 236B version hits low. He is also another character with a super strong anti-air via his 5B.
What truly makes Rentaro scary his is install trump Terminal Horizon, it makes Rentaro considerably faster, his charge moves are faster and he undergoes a 10% attack boost. Combined with a good assist (Enju being his best assist, same series synergy) he can convert into major damage off a single surprise hit and then apply even scarier pressure. If theres any cons to Rentaro that all his optional routes are a bit on the execution side and that his normals are a bit shorter compared to other strong characters beside him but aside from that he’s a really strong character.
Video: https://www.youtube.com/watch?v=mi6kr5Bcqvo&feature=youtu.be&t=12m17s

Akira Yuki:
Akira is a strong footsies-based character that can move in on the opponent and punish bad movement easily. He does suffer against zoning a little, but a good assist can clear the way for him to advance with his quick dash. He is also somewhat of a mixup-type character, setting up 50/50 situations off many of his attacks. A few of his moves are notorious for being somewhat ignorant, such as 2C and 66B. 2C comes out really fast for some reason and has a good anti-air hitbox in the area 1-2 character spaces in front of him. Pushblocking with 2B+C can sometimes beat frametraps because of how fast 2C comes out and how far it hits. 66B moves half-screen, is air-unblockable, jump-cancellable on block, and can easily be confirmed into 2C or 214A (a combo-extending move). An obvious 66B can be stuffed, however, so it is most reliable catching people who are landing or after a scramble. As with most characters, his C buttons are unsafe on block, so if you ever press one, make sure you input 214A to make it safe. This somewhat option selects a combo since you can link 5B off 214A.
Akira’s mixup game is very strong. Due to the fact he is a step/dash character, it becomes somewhat more difficult to react to his fast dash during grab/grab bait mixups. He can do 50/50s off 41236B+C or throw and then super jumping, as well as comboing into 236C in the corner. Combined with his short but quick movement, Akira becomes a very strong character in the cast.
Video: https://www.youtube.com/watch?v=5zUI7FKPMgQ&feature=youtu.be&t=0m25s

Selveria Bles:
Selveria is a character that seems very strong on paper. Long normals, fullscreen trump card, fireball that hits various times, teleports, various properties on her moves. But for the most part it’s mostly an illusion. While her normals are long and allow for good spacing with proper footsies, they’re slow to start and have a lot of recovery on whiff. Her trumpcard is fullscreen and air unblockable but is extremely punishable and is not an overhead. This makes it a very risky wake-up option and also leaves her with 4AB as a grounded overhead option. While she does have a fireball and can vary in hits, it has a large amount of recovery and start up and isn’t hard to punish. An example: 236X can be punished fullscreen on block with Misaka’s railgun and 236B/C can be punished with Accelerator 6D. Her teleports have recovery at the end before you can act or the follow up comes out and can be punished easily on reaction.
All of her options have large downsides to them even though they also have strengths. She compensates largely for her abilities with recovery and speed. However, she is one of the characters capable of meterless hard knockdown. Her damage is quite solid and she can convert off pretty much everything she hits you with in one way or another. All the tools she has makes her flexible when it comes to combos and conversions. With the right resources anything she touches you with can be combo’d into super. She has solid damage for low resources as well. To boot her 2AB can combo into super for only those two bars.
Video: https://www.youtube.com/watch?v=YSCijOCBCsI&feature=youtu.be&t=4m57s
