Written by Devin “JINXHAND” Williams
***Background***
For those not familiar with the series, Battle Fantasia was a fighting game that was released in Japanese arcades in 2007 by Arc Systems Works. A year later, the game was ported over to consoles in 2008. This was ArcSys’ first attempt at making a 2D game that utilized 3D cell-shaded graphics, and dynamic camera angles. Despite the mixed reviews the game received, the game was considered very unique due to it’s battle system and overall flair. Yoshinori Ono of Capcom fame has also credited the game as a source of inspiration for Street Fighter IV. Battle Fantasia was the prototype that eventually made Guilty Gear Xrd a reality, so far that we have this game to thank. Now with that out of the way, let’s get into the game’s battle system.
***System***
Battle Fantasia is pretty simple in its approach. There are five buttons, A (Light Punch), B (Light Kick), C (Heavy Punch), D (Heavy Kick), and G (Gachi) which is a multi-purpose button that will be discussed later. For some characters, the C and D buttons may act as weapon based attacks, similar to the Guilty Gear characters that utilize Slash, and Hard Slash attacks. Throws work like Street Fighter IV, where you would press A+B to initiate the throw, or throw break. Dashing, jumping, super jumping, dash jumping, and other types of movement work the same as any other fighting game, with the exception of Ukemi (tech rolling). A couple of characters have additional means of movement within the air as well.
***Gachi***
As mentioned before, the Gachi button does multiple things. The basic function is parry, in which there are two main types. The first type is called Gachi Match, and it’s simply what it sounds like. You are “matching” the attack thrown at you with a parry. Gachi Match can be done while standing, crouching and jumping. The second type is called Gachi Drive, have two different types. Gachi Driving can only be done while standing by pressing forward+Gachi (High Gachi Drive), and while crouching by pressing down-forward+Gachi (Low Gachi Drive). Successfully using Gachi will grant a stronger counter hit state called G-counter, and can allow for unique and high damaging combos. In conjunction with stronger hits and combos, players can transition into Heat Up, which provide character-specific buffs. Not every attack can be beaten with a Gachi Drive. Fast moves, typically A and B attacks, and quick recovering special moves cannot be beaten with Gachi Drive. You also won’t be able to Gachi Drive invincible moves or multiple hitting moves, except at the last hit of the move. Gachi Drives also lose against fast normals that get canceled into special attacks. While Gachi is an important tool, it is one that requires playing smartly in order to truly use it to your advantage.
The Gachi button also allows players to recover from a Soft Knockdown by tech rolling, or Ukemi. Right before hitting the ground, tap G and your character will recover and roll backwards. The only real downside to this is that the only direction a character will go is back, unless the character is facing the direction he/she is falling. Recovering in this state will make the character roll “backwards”, but in the direction of the opponent. This situation has no real practicality or benefit.
***Heat Up***
When the MP meter at the bottom of the screen fills up, you can enter a mode called Heat Up by pressing both A+C or B+D. At it’s core, Heat Up can give a character unique abilities such as stronger special moves, super armor, a new super move, or a whole new move set altogether. Couple Heat Up with Gachi will result in massive damaging combos.
***Characters***
Below are quick synopses of each character in Battle Fantasia. Here you will find their overall playstyle, and their Heat Up ability.
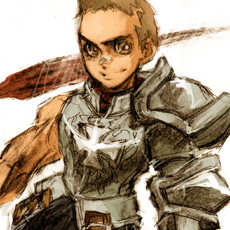
==Urs==
As the main character of the series, Urs can be considered as the “Ryu” in the game. He has strong hits that can be combined to create devastating combos. Don’t expect to throw fireballs at a distance though. Urs is mainly a mid-range character that can keep an opponent locked in with his C attacks and frame traps involving his Bari Fire Shot (quarter-circle forward+A/C). Up close, he can utilize a basic but strong mix up game involving high hard hitting attacks, low attacks that produce Hard Knockdowns, and throwing. Urs has Full Throttle Road Master (quarter-circle forward x2+A/C) which is a dashing super, and Basilisk Burst (quarter-circle forward x2+B/D), a punch that hits hard like Ryu’s Shin ShoRyuKen. Urs’ Heat Up changes his fireballs’ trajectory from straight to an upwards arc, as well as beefs up his other special moves. Urs’ Bari Fire Blade (forward, down, down-forward+A/C), and anti-air attack, can force a Hard Knockdown. His Speed Glide (down, down-back, back+B/D) becomes an awesome combo asset, as it does more hits, and can be used to juggle the opponent to the corner. As simple as he might seem, Urs is definitely a powerhouse worth starting the game with.
Playstyle – Footsies/Spacing, Fireball/Anti-air
*Pros*
- All around playstyle; has an answer for all situations.
- Great anti-air attacks
- Strong meterless combos
*Cons*
- Limited mixup game
- Some attacks aren’t as strong as they appear to be (i.e. – fireball)
*Strategy*
- From the beginning of the match, Urs has the advantage in many matchups due to the fact that his 5C has a good range. At the right distance, Urs can cancel his 5C into his 236+A/C, allowing him to either force the opponent to Gachi and get punished, or have the opponent block and give Urs the initiative to continue on the offense. Not too much can be done on neutral other than 5C, and reacting to attacks. If a fireball is thrown, he can simply 236+B/D and go through it, possibly scoring a counter hit. If the opponent jumps, simply 2C or go for his 623+A/C. If the first option is picked, Urs can cancel 2C into his fireball, putting Urs at an advantage once more. Up close, 5C changes, and gives him frame advantage, making the fireball even stronger. On either normal or counter hit, Urs can link 5C into 2D, which is an easy setup for okizeme. If the opponent is down, charging 6C or going for a ranged 2D can add further damage on wake up, since most opponents won’t Gachi on wake up and at times won’t block low. If they happen to block low, if Urs is far enough, he can only be punished by character-specific attacks. If you’re not confident in using 2D, there’s always 1D, which can be canceled into either the fireball if 1D was blocked, or you can cancel into 236236+A/C. Urs’ 2B can be a great way to hit confirm into a super if done up close. Heat Up should mainly be used in combos and if you want to use 623A/C as an anti-air attack that forces a Hard Knockdown.
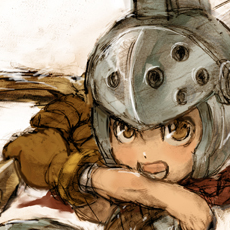
==Marco==
Just like Urs is “Ryu”, Marco is the “Ken” of Battle Fantasia. He’s slightly weaker, but faster, and has more mixups that make him a deadly force. Marco’s projectiles (quarter-circle forward+A/C), and anti-air attacks (forward, down, down-forward+A/C) have way more range than Urs’ specials, but don’t hit quite as hard. Just like Ken, Marco has a ShoryuReppa super (quarter-circle forward x2+A/C), and Final Strike (quarter-circle forward x2+B/D), a super very similar to Basilisk Burst. In Heat Up, Marco’s pet dragon CharSiu becomes a fierce dragon that gains two moves (quarter-circle forward+A/C and quarter-circle forward+B/D), allowing Marco to not only create insane mixups and block strings, but also give him the opportunity to close out a match quickly with high damaging combos.
Playstyle – Footsies/Spacing, Fireball/Anti-air, Heavy mixups, Zoning
*Pros*
- All around style; has an answer for all situations.
- Can create really strong combos with his Dragon
- Strong mixups that lead to massive damage
- Has awesome tools for punishing blocked/whiffed attacks
- Can build meter pretty fast
*Cons*
- Heat Up locks Marco’s moves until a Dragon specials is done
- Fireball has longer reach, but is weaker
- The best mixups require going into Heat Up
*Strategy*
- Marco, considered to be the “Ken” of the Battle Fantasia, has fast attacks that do light damage, and has more mixups than his brother Urs. His 214+[B/D] feint attack, and low hitting 6B, which can cross up some crouching characters, are just two of the tools he has to force characters into blocking incorrectly once he gets up close. From neutral, Marco has a 5C that works somewhat like Urs’ 5C. It can also be used as an anti-air at the right range. 236+C knocks the opponent down, so he can close in by dashing or using 214+[D]. Marco has strong tools for crossing up the opponent, including j.B, j.2C, and j.D. Building meter is essential for Marco, since he truly shines in Heat Up. While in Heat Up, the Dragon has 236+A/C, which is a fire attack that can keep the opponent in block stun for quite some time, giving Marco a chance to fish for an overhead or a low hit, leading to a combo or knockdown. The Dragon also has 236+B/D, which has some potential in combos and mixups, but actually works well as a way to keep the opponent from jumping.

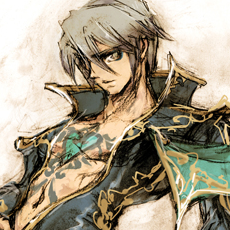
==Cedric==
Fans of Guile and Raiden from King of Fighters fame rejoice! Cedric is the character for you! Not only does he sport great “Sonic Booms” (charge back, forward+A/C) and “Somersaults” (charge down, up+B/D) that can turn into short hops if A or C is pressed instead of B or D, his infamous Saint Dropkick (press and hold D, release D) that has four charge levels, increasing in damage and combo potential the longer the D button is charged. These tools provide Cedric a unique play style that does well with zoning. Cedric is one of a few characters who can combo from their normal throw, and his throw in particular allows for resets anywhere on the screen. At close range, Cedric has back+B that lets him rush down and gives him attacking initiative. There’s also Eternity of Regret (quarter-circle forward x2+A/C), which is a super fireball that travels slow, but speeds up. If ever he’s in a corner getting rushed down, Cedric can simply bust out with Hammer of the Gods (quarter-circle forward x2+B/D) to counter and gain a way to combo as well. With Heat Up activated, the Sonic Booms come out in twos, and the Somersaults hit multiple times. Saint Dropkick increases in combo potential while in Heat Up, too.
Playstyle – Heavy zoning from neutral
*Pros*
- Strong projectiles, and anti-air options
- Saint Dropkick can do tons of damage and lead to strong combos
- Has normals that give frame advantage
- Capable of comboing from throw
- Has easy resets
*Cons*
- Charging Saint Dropkick can make gameplay a bit awkward
- Charging Saint Dropkick locks Hammer of the Gods counter super
- Doesn’t have good options against rushdown characters
*Strategy*
- The first thing Cedric players need to do is charge. The question is what move to charge. Usually, the best move to start charging is 4[6]+A/C. Cedric’s main goal in most of his matchups is to stay neutral at all times. If things get too close for comfort, 5C can keep opponents at bay. 5C can be cancelled into 4[6]+A/C, which is good for increasing the distance for zoning. For some players, staying at neutral isn’t enough, and Cedric has the tools for that. 4B works as a fast poke that gives frame advantage, but it can also be used as means to punish attacks, and is a good combo starter since it links with 2B. If during that 2B you happen to be charging a dropkick, let it loose for a strong combo. You may find Cedric’s throw to be more beneficial than a throw that does a Hard Knockdown, since he can combo from it. At the very least, throwing out a 5C after a throw produces a quick and easy reset. For those that realize how strong Saint Dropkick really is, do not assume that you cannot get punished on block, unless of course you decide to dropkick ahead of a projectile, keeping you somewhat safe outside of Gachi.
==Ashley==
Ashley doesn’t quite compare to most fighting game characters. At best, he’s closely related to Talbain from Darkstalkers in terms of overall fighting style, or even Vega for overall annoyance. Quick overheads, fast pokes, constant movement, short but damaging combos, “Beast Cannon” combos, and a couple of command grabs pretty much sum up what Ashley can do. One of his command grabs (half-circle back+A/C) boosts his Glance Wing (quarter-circle forward+A/C), increasing combo potential. Ashley has Loyal Heart (quarter-circle forward x2+A/C), a super dash attack, and Secret Desire (quarter-circle forward x2+B/D), a close uppercut-like super. During Heat Up, Ashley’s dashing special moves can now be done in the air, and at different angles. He gets Romance Wing (quarter-circle forward+B/D), which are diagonal versions of Glance Wing that can be done from either standing or jumping. This gives him another way to catch the opponent with a quick overhead, and provides a true “Beast Cannon” combo which is one of his strongest combos by far.
Playstyle – Rushdown with the emphasis of overhead attacks
*Pros*
- Very fast movement and pokes
- Has overhead attacks that are safe on block
- Contains a set of unique normal attacks
- Builds meter pretty fast
*Cons*
- Ashley is a floaty, which means he can take more damage from combos/juggles
- It’’s easy for a player to go “auto pilot” when playing Ashley
- Unique moves are still beatable with Gachi
- Strongest combos require Heat Up
*Strategy*
- Alot of Ashley’s playstyle involves going straight to the air, and using j.B for a quick instant overhead attack, or using j.2C to attack from a seemingly short hop that allows for combos and interesting mixups. Ashley’s 63214+A/C command grab boosts his 236+A/C, so naturally rushing down while putting the fear of a non-breakable grab is vital for Ashley. Using short pokes at different intervals will at times force the opponent to attack out of turn, giving Ashley initiative to punish quite easily. Up close, 2B > 2C ~ 236+A/C works as a strong punish, whereas from midrange, you would want to use 5D~236+A/C. Heat Up is very important for Ashley, since it gives him 236+B/D. While in Heat Up, you’ll want to use any chance you get to combo with both 236+A/C and 236+B/D. These “Wing Loops” can be done in almost any order, and does a huge amount of damage.
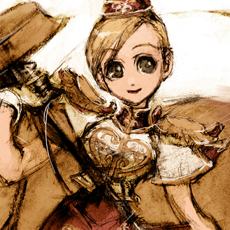
==Olivia==
Don’t be fooled by a pretty face. Olivia is definitely a character who is deadly, provided the player is solid on the fundamentals of the game. Having a hodge-podge of fighting mechanics from the likes of Chun-Li, Makoto (3S), and a dash of May (Xrd), Olivia has several play styles that work in her favor. One of the most important tools is her command grab, Shall We Dance (half-circle back+A/C). While it doesn’t do a lick of damage, it gives a huge frame advantage. This advantage is large enough for Olivia to dash in afterwards, and lead a combo with a heavy attack. Her air special, Empress Lily (quarter-circle back+B/D while jumping) can be feinted by holding the button pressed, and the move then becomes a short hop that allows for overhead attacks. Unlike Makoto and Chun-Li, Olivia doesn’t really have a great anti-air, despite having Rote Rose (forward, down, down-forward+A/C), so relying on Gachi can be even more important for her. Olivia’s two supers are fairly good. Eglanteria (quarter-circle forward x2+A/C) is a super version of her Dainty Livi special (quarter-circle forward+A/C). The second super, Centifolia (quarter-circle back x2+B/D), is just a super flag twirling attack that is great for punishing enemies up close. In Heat Up, Olivia summons birds to assist her in the fight. Each attack calls out a certain number of birds to attack as well. This can lead to easier link combos, and interesting block strings and cross ups.
Playstyle – Mid range footsies, very fundamental-based, situational mixups
*Pros*
- Good mid range pokes
- Command grab grants free combos
- Heat Up ability allows for unique combos
*Cons*
- Heat Up Unblockable is removed in the latest version of the game
- Has no real anti-air attacks
- Has combos with small damage output
*Strategy*
- In order to truly win with Olivia, you need to understand the range of her strongest pokes. 5C, 2C, and 5D are her strongest mid range pokes. At times, using 2D can work, but that is typically used up close, mainly from her 5B > 2D attack set. 5C and 2C can be punished if done too close, so be mindful of the range. Up close, combining the 2B > 2A with her 2A > 5D attack sets create a great block string (2B > 2A > 5D) that does a good amount of damage if it connects. Remember that 2D causes a Hard Knockdown, with the option to juggle with moves like 236+A/C or 5C if timed right. Juggling will remove the Hard Knockdown effect, but does push the opponent closer to the corner, so use both options wisely depending on the matchup. If you meet the opponent in the air with j.D and hit them, you can cancel into j.214[B/D], and can fake the opponent out since you’ll be using the feint version of the move, creating short hop mixups similar to Cedric’s flash kick feint. This setup isn’t great against characters with strong anti-air attacks, so if you decide to use it, make sure that you’re prepared to possibly defend with Gachi. Most importantly, 63214+A/C, the command grab, is vital in Olivia’s overall game. Since her damage output is rather low, you want to use this throw any time you can, especially for punishes. Keep in mind that vs Watson, the throw will launch him in the air, so combo accordingly. Heat Up is very important for Olivia. Having extra attacks added to each normal increases combo potential, especially in the corner. If also gives Olivia a better chance of keeping the opponent in blockstun, while doing chip damage.

==Watson==
For those who play characters like Testament, and other trap/setup based characters, Watson is your rabbit for the job. With a unique leveling system that strengthens his Platina Ball “fireballs” (quarter-circle forward+A/C) and Torabasa Minore “bear traps” (quarter-circle forward+B/D), and some Blanka roll attacks (quarter-circle forward+B/D while jumping) to help with crossups and wall carries, Watson is definitely worth giving a try. Some players feel using him can become an uphill battle due to the work required to level up. Hitting opponents three times with any version of his C attack (jumping, standing, crouching), will allow Watson to “Level Up”. The staff glow shows the level Watson is currently at (no glow= level 1, blue= level 2, and red= level 3). Just as Watson can level up, he can also level down any time he’s knocked down, so knowing which moves to recover from with Gachi is important. Watson’s supers are quite interesting. His first super, Alsuhaif Almuhlif (quarter-circle forward x2+A/C), is a big ball of energy that comes from his wand, and his second super, Torabasa Mayore (quarter-circle forward x2+B/D), is a bigger version of the bear trap (with a curly mustache). In Heat Up, Watson can shoot both projectiles at once, and his Blanka roll attacks receive slight boosts. The most important part of Watson’s Heat Up is that he gets a third super, Meteor Shower (quarter-circle back+A/C x3), which can be used in combos, and is very hard to defend against.
Playstyle – Setup based mixup involving traps, level up system
*Pros*
- Level Up system makes Watson’s special moves stronger
- Has a meteor super that can be done in Heat Up
- Trap-based playstyle allows for mixups from multiple aingles
*Cons*
- Hard Knockdowns and not failed Ukemi attempts delevels Watson
- Some matchups can be very hard if not leveled up
- Each round resets Watson’s level back to 1
- Has the lowest health in the game
*Strategy*
- Watson may have lots going against him, such has having low health, and some hard matchups, but he does have lots going for him once he’s truly mastered. Knowing combos that quickly level Watson up is key to victory. Most of what he can do comes from his 5A > 5B > 2C attack set, so following up with j.D, j.2B, j.C afterwards will not only level Watson up at quickly, but will also push the opponent to the corner. From the beginning of the match, there’s not too much Watson can do, so he’ll have to close in to score a combo or a knockdown. Once Watson is leveled up to 2 or 3, he can start working on doing stronger mixups involving 236+B/D traps, or if he’s mid to long range, he can use his 236+A/C projectiles to close in without too much fear of a counter attack or Gachi. 6A can link with 5A on counter hit, so paying attention to the screen will help, as the announcer only says counter for g-counter hits. If you’re looking for a quick Hard Knockdown, hit confirming with 2A and going into his 2A > 2D attack set will definitely net a Hard Knockdown. This is the time to start laying traps with 236+B/D. From there you have the option to mixup with j.236+B/D and j.B to crossup the opponent, fish for an overhead with 6A, or even use the setup to throw the opponent. As for meter, most players tend to go into Heat Up and create a huge gap with traps and fireballs so they can use 214+A/C x3. The meteor super is so good that the chip damage alone does a good amount. All of this can be done once Watson tackles the hurdle of leveling up. Speaking of which, it is also important to know what moves Watson can Ukemi from. Failing to Ukemi when you can will make matchups harder for Watson.
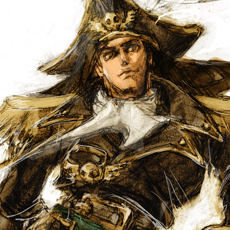
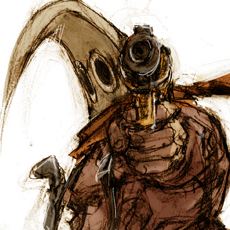
==Freed==
As a captain of a pirate ship with a huge hook, no one would expect Freed to play like Balrog. He doesn’t have a Turn Around Punch, but his moveset is very solid especially considering he’s the only character without a command normal. There’s the dash punches (charge back, forward+A/C), uppercuts (charge down, up+A/C), overhead specials (charge back, forward+B/D), and specials that trip opponents (charge back, forward+B/D [hold]). Freed also has a super dash punch (quarter-circle forward x2+A/C), and a super uppercut (quarter-circle forward x2+B/D) that turns into a super beam attack after the initial hit connects. His throw is also excellent, because it forces a Hard Knockdown, and sets up for mixups involving Heat Up. Speaking of which, Freed’s Heat Up activates a doppleganger, or rather a shadow that mimics Freed’s specials once he executes them. This ability greatly enhances combo potential, as well as creates mixups that can occur from both opposite ends of the opponent.
Playstyle – Mid to close range footsies, Linear rushdown
*Pros*
- Normal throw produces Hard Knockdown and creates Okizeme opportunities
- 5A > 2D attack set produces Hard Knockdown
- Can punish really hard moves without the need for a command throw
- Doesn’t need Heat Up to win
*Cons*
- Has no command normal
- Very linear in gameplay
- Requires Heat Up for any real mixups
- Has no real safe block strings up close
- [4]6+A/C can be crouched under by short characters
- Has no real defense outside of Gachi
- Has no reliable anti-air attack
*Strategy*
- Freed is a straightforward character. The goal is simple: build meter, Hard Knockdown, and mixup with Heat Up options. He has [4]6+A/C which is a simple dash punch that most times can be used as a mid range block string ender or a punish if timed right. There’s [4]6+B/D which is Freed’s best and only real overhead attack. [2]8+A/C is mainly used in juggles, the light version is best for punishes up close because it comes out so fast. In the corner, [2]8A, [4]6+A becomes a possible juggle. Freed also has [4]6+B/D which hits low, but most players won’t find success with this move. On top of that, it’s not safe on block, so it’s not a good idea to use this often if at all. Up close, 2A can work wonders if you know how to chain it with 5A. This creates the chance to combo with 2A > 5A > 2D, knocking down the opponent,. If you’re good at blocking moves that are typically safe (-4f on block), 5C can be the best way to punish because it comes out in 4 frames. Couple that with the fact that it can cancel into a special or super makes 5C a very deadly tool. This alone punishes many characters moves on block, and it’s not a command grab, which is something that Freed lacks. Freed’s normal throw produces a Hard Knockdown, which is good against characters like Watson. Using this throw helps for mixups that require Freed to be in Heat Up. This is very important for Freed, because in Heat Up, he can create frame traps that appear to be gaps in his rushdown, but actually give him good initiative. Freed can also attack the opponent from both sides. Lastly, in Heat Up, Freed can literally stack up the damage with corner carry combos, and loop combos. If you prefer not to use Heat Up, a solid hit confirm into 236236+A/C will do the trick.
==Donvalve==
What fighting game would be complete without a grappler? Donvalve is such a powerful character that has long ranged attacks to corner opponents, and really strong grabs that in order to keep things fair, he does not have a forward dash and his walk speed is really slow. To compensate for this, Donvalve has a dashing special attack, Catapult Hammer (half-circle forward+B) that can be canceled in order to quickly close in on the opponent. Pressing D instead of B turns Catapult Hammer into Catapult Throw, which will instantly slam the opponent to the corner no matter where Donvalve is standing. He has a super throw, Don Don Swing (720+A/C), which does more damage based on the number of 360 motions made on the stick, and an anti-air super throw, Flying Don Cake (quarter-circle forward x2+B/D) that can be defended against with Gachi. Heat Up makes Donvalve even more of a threat, due to the fact that his walk speed increases. He also gains super armor, and gets an easy input command throw simply by pressing forward+C. Many Zangief and Potemkin players will feel quite comfortable picking Donvalve and destroying the competition with him.
Playstyle – Grappler
*Pros*
- Really high HP
- Has long reaching normals
- Has moves with armor, preventing momentum from being stopped
- Has a good anti-air normal and super
- Has alternate means of moving across the stage without walking
*Cons*
- Can’t build meter effectively
- Has the second slowest walk speed in the game
- Has one of the strongest supers in the game
- Some moves that have armor can still be stopped easily
- Despite being huge, he’s still really floaty
- Anti-air grab super can be stopped with Gachi
*Strategy*
- As you can guess, Donvalve is the grappler of the game. With his slow walk speed, and short ranged grab, you would think that he’d have a hard time winning. He can depending on matchups, however, knowing all of the tools Donvalve has can make those matchups a bit easier. For starters, Donvalve has one of the longest reaching normals in the game. Both 5C and 2C work wonders in his overall game. Another thing to note is the fact that all of his normals, with the exception of 5A, 2A, and 2C, all move him forward. This is vital to know, because essentially what Donvalve needs to do is push the opponent to a spot that he has limited movement in, giving Donvalve the option to either grab on the ground with his 360+A/C, or catch the opponent in the air with 4C or 236236+B/D. From neutral, 5C and 2C when possible. For those characters with projectiles, there is a possibility to 214+B/D in enough time to knockdown the opponent, and still Gachi the projectile. This is a quick way to build meter from afar, but you don’t want to be that far in the first place. Knowing when to use both variants of 41236+B/D also plays a vital role in Donvalve’s mixup game. Typically up close, 41236+D is great, because it has armor, and it takes the opponent to the corner automatically. 41236+B is even more important, because from midrange, the opponent might assume it’s Donvalve’s grab move, so they’ll jump naturally, making them great targets for the hammer that comes out instead. If you’re not too sure this move will hit, simply hit A/C to cancel the dash attack. On Hard Knockdowns, you’ll want to 41236+B~A/C to close the gap between characters, and this is the best and quickest option. Keep in mind that 41236+B hits high, and does not have armor, whereas 41236+D does have armor, and will whiff if the opponent jumps. In the corner, 4B is a decent setup to get a 360 throw. If the opponent smartens up, 4C can counter the jump. Keep in mind that since 4C is a good anti-air attack that can cancel into specials or supers, for mixups you can cancel into 41236+B with the option to feint at any time. In some cases, hitting with 4C and cancelling into 236236+B/D won’t combo, but you’ll get full damage for the super. Even if you happen to combo with the super, the damage is still good. Whenever you can use 720+A/C, use it!!! And when you do, keep rotating the stick in 360 motions for maximum damage. That is a must!!! You’ll find that you won’t really rely on Heat Up unless of course you like to scare the opponent with super armor and an increased walk speed. Couple Heat Up with 41236+D makes Donvalve almost unstoppable. He is able to get past multi hitting supers with this setup. If all else fails, 360 throw like a madman.
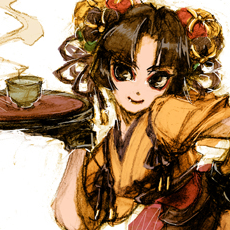
==Coyori==
Fans of characters with “Rekkas” or sequencing specials may want to try out Coyori. First thing to note, she is the only character with a motion input air dash. Aside from Marco, she is another character with a plethora of mixups, whether it involves feint attacks, double overheads, or corner resets. Most of her specials start from Tea Is Ready (quarter-circle forward+A/C), and other inputs can be done afterwards to either combo or mix the opponent up with a flurry of attacks. Coyori is beyond capable of building meter for her supers, but most players tend to use meter for her incredible Heat Up ability. In Heat Up, Coyori can chain attacks that aren’t normally chainable. Not only are they chainable, but on hit all normals can be jump canceled for increased combo potential, or even mix up potential. The C and D rekka enders can also be jump canceled. Movement wise, Coyori moves faster, and can double jump, which is also vital to winning with her.
Playstyle – Air-to-ground mixups, heavy rushdown
*Pros*
- Builds meter really fast
- She’s the only character to have a true air dash
- Has the farthest dash in the game
- Not a real floaty character
*Cons*
- Heavily relies on Heat Up to win
- No real safe Hard Knockdown options
- Options from Rekkas aren’t totally safe
*Strategy*
- Coyori is without a doubt the most Heat Up reliant character in the game. That’s not totally a bad thing. She actually builds meter faster than any of the characters so far, that’s including Watson, Face, and Marco. Knowing the options from Coyori’s rekka attacks are essential in playing correctly with her. Coyori’s B and C options have feints which can be done by holding the button pressed. 6B and C are overheads, both about the same speed, but C launches for a juggle opportunity. If you time it right, doing a rekka into a feint can create an opportunity for a throw. From all of her light attacks, you can cancel into 236+A~D, which will produce a Hard Knockdown and build a substantial amount of meter. While in the air, j.A can chain into j.B, which is good to use when air dashing. She doesn’t really have a great anti-air except 236236+B/D, and even then you have to mash both B and D to get the most damage from it. You don’t want to use meter for supers most times, because Coyori truly gets stronger in Heat Up. She gets more chain attacks, her 2D and D ender from rekkas now launch, she can double jump, and most importantly, Coyori gets the infamous j.B loop. By combining the double jump feature with air dashing, after launching the opponent, Coyori can loop j.B > JC > IAD > j.B, land, and do it all over again, up to three times. Instead of doing the third loop, most players tend to land and then user 5A for a reset into another loop. This can only be done in Heat Up.
==Face==
Face is another Rekka style character with emphasis on interrupting the overall game flow, making the opponent strike out of turn, and capitalizing on it. Face is the character that can easily slow the pace or pick things up, and force the opponent to catch up. Pressing quarter-circle forward/back+A/C starts the rekka, and depending on which input was done determines which direction Face rolls or sways before shooting his revolver. There are a few options from this special, as he can use the opposite input to do another rekka, and either quarter-circle forward+B/D for a low, or forward, down, down-forward+A/C for an overhead. His rekkas have feints (hold the button pressed after inputting the rekka) and follow ups similar to Coyori, but they hit harder and can be canceled into either his Wilderness Bazooka super (quarter-circle forward x2+A/C) that does loads of damage, or into Raging Revolver (quarter-circle forward x2+B/D) which can punish opponents who attack out of turn still. Let’s not forget the popular Texas Knee (forward, down, down-forward+B/D), a Tiger Knee attack similar to Sagat’s, is used in combos, as a way to build meter, and as a means to close in on the enemy. In Heat Up, Face’s rekkas turn into gun shots, allowing Face to shoot from different angles. Inputs become a bit more lenient, as instead of only doing quarter-circle back+A/C into a quarter-circle forward+A/C, or vice versa, Face can continue to do the same move immediately after the first input. This gives him an interesting way to mix up, combo, zone, or even punish from afar. The catch is that Face only has six shots before leaving the Heat Up state. By far, Face is the most stylish and unique character in the game.
Playstyle – Mind game based, Frame traps
*Pros*
- Texas Knee builds meter quickly, and juggles from anywhere on the screen
- Almost anything Face does builds meter quickly
- Most attacks are safe
- Strong combos both in and out of Heat Up
- Very strong ground based mixups
*Cons*
- Texas Knee is throw punishable
- Rekkas can’t nullify projectiles
- Heat Up removes Rekkas
- Heat Up ability only allows for six shots
*Strategy*
- When using Face, understand that his rekkas do not entirely work like Coyori’s. 236+A/C, 214+A/C and the followups may combo and lead to mixups like Coyori’s, but Face has feints for the first two specials mentioned, meaning that he’s all about forcing the opponent to attack out of turn quite often, or not at all. From this scenario, one of two things can happen. The opponent could attack out of turn, giving Face the chance to counter with something like 623B/D (Texas Knee), 5D (which wall bounces on counter hit), or 236236+B/D (which goes right above opponents and does a good amount of damage). The second thing could be that the opponent doesn’t attack out of fear of getting punished, and that gives Face yet another opportunity to do damage by throwing, or if the opponent is standing (or crouching), they “face” the threat of getting hit with either the 623+A/C (or 236+B/D) ender. The fact is, Face has an answer anytime a character attacks out of turn, more so than the rest of the cast. Even from neutral, if the opponent decides to do something like throw a projectile, and Face is expecting it while sitting on meter, he can easily use a reactionary 236236+B/D to punish at whatever range the enemy is standing at. At any point the opponent hits the ground, Texas Knee with 623+B at least once, twice if you’re quick enough. This builds meter rapidly, so that you’ll have stronger comboing options like 2B ~ 236+A ~ 236236+C. Up close, it’s usually safe to use his 5B > 5D attack set with or without cancelling into a rekka. You’re definitely going to want to throw often with Face, as this gives him the ability to use Texas Knee to build meter quite often, since the throw gives a Hard Knockdown. Against projectiles, you can use 236+[C] to roll under it. of use 236+A/C in Heat Up to shoot through the projectile. Normal rekkas do not stop projectiles!!!
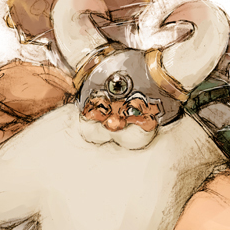
==Deathbringer==
Deathbringer is the final boss of the game’s story, and he has the tools to prove it. Don’t be fooled by his really slow walk speed. His dashes are rather quick for someone huge, and his jumps cover so much space. Deathbringer has Warcry (quarter-circle back+B/D) that charges his special moves, making them do more damage and even gives a move super armor. With that in mind, most players would want to rush him down to prevent Warcry from occurring. Doing this a pain, because he can toss out his standing and crouching C attacks that cover lots of distance, and not worry about much retaliation. Even with Gachi applied, at the right distance, Deathbringer can keep most of the characters at bay with his C attacks. On hit, the C attacks hit twice, with the second hit drawing the opponent towards Deathbringer for him to follow up with a strong hitting special, or a standing/crouching A for a quick reset. His next longest move is crouching B, which is great for poke and can hit confirm into his Fire Blow (half-circle forward+A/C) on block to stay safe, or his Flame Claw (forward, down, down-forward+A/C) if crouching B connects. The closer Deathbringer is to his opponent, the deadlier he is. His standing A attack is so strong, it works as a great poke, and the start of devastating link combos. Against characters getting up, Deathbringer can use forward+D which can become unblockable if held long enough. Warcry also allows the D version of Fire Blow to become unblockable. As for supers, Deathbringer only has one outside of Heat Up, and that’s Final Inferno (quarter-circle forward x2+A/C). This move takes awhile to start up, but when it’s started, expect high damage. This super has 4 levels, with the last level doing a whopping 9999 damage. Even on block, the super move will do a good chunk of chip damage. Jumping over this super won’t work either, as it auto corrects the attack. It also has super armor, so the only real way to beat this move is by throwing Deathbringer, or simply standing really far away, assuming you’re not trapped in the corner when this super is activated. In Heat Up, Deathbringer’s C attacks lose the double hit, but can unlock a new super move, Final Strike. All you need to do is hit the opponent three times with any sword attack (all C and D attacks) for the move to activate. The best way for this to happen is through combos, mainly those involving Gachi Drive. Without a doubt, Deathbringer is truly a boss worth checking out.
Playstyle – Self boosting, mid range footsies, unblockable setups
*Pros*
- Has the second highest HP
- A attacks give a huge frame advantage
- 5C is the second farthest poke in the game
- Self boosting ability increases movement speed and special moves
- Has hit confirming options based on successful/failed hit
*Cons*
- Very floaty
- Has the slowest walk speed in the game
- Super attack can only combo under certain conditions
- Gachi is really strong against C attacks
*Strategy*
- Deathbringer is a character that is very deceptive in playstyle. His walk speed is slow, but his dash is pretty fast, and his super jump travels far. He is capable of comboing from midscreen due to his 5C and 2C attacks hitting twice. The second hit of each normal pulls the opponent inward, increasing juggle potential. 5C and 2C need to be used at a good distance, because it’s usually not safe up close. Gachi also nullifies the second hit of these moves, leaving Deathbringer open for retaliation. Deathbringer’s 5A gives such an advantage in frames, that he can link his 5B > 5D attack set, or link with 2C, with both options allowing for juggle follow ups. On block, 5A and 2A still keeps him safe. On counter hit, Deathbringer can combo his 2A > 2D, which produces a Hard Knockdown. This is paramount for Deathbringer, because at that point he can use 214+B/D. This boost the C versions of 63214+C, 623+C, and the D version of 41236+D. This boost makes 41236+D unblockable. Speaking of unblockables, Deathbringer can charge 6C to make it unblockable. This command normal gives a Hard Knockdown, which gives him another opportunity to use that Warcry special. If opponents think they can stay safe by spamming projectiles, using a charged 214+D will eat the projectile with armor and punish accordingly. Catch opponents off guard with 2B. It’s his third longest normal, and being cancelled into 623+C does sizeable damage. If 2B is blocked, cancelling into 41236+B is the safest option. You have the option to use 236236+A/C, but there is a chance that you can get thrown out of it, so be careful when using this special. The opponent jumped over you while you’re charging 236236+A/C? No problem! The move auto corrects!!! It’s recommended that meter is used for Heat Up, and that Heat Up should only be used in combos. Heat Up combos involving Deathbringer’s sword does so much damage that you would only want to go for those combos most times. Using a Gachi Drive opens up more opportunities for those types of combos to occur. An easy example of this is 6G~HU, 5B > 5D, dash, 5B > 5D, JC, j.D ~ Final Strike (this combo can be done anywhere on screen). To do Final Strike, all you need to do is hit with Deathbringer’s sword attacks (any C or D attack) three times. How much more of a threat is Deathbringer now???
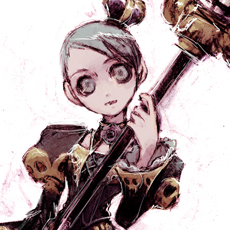
==Odile&Dokurod==
Last but not least, we have Odile&Dokurod, or Odile for short. Many people initially wrote of Odile as an Olivia clone, but she’s far more than that. She is another character whose playstyle doesn’t really compare to any real known fighting game characters. She has drill kicks (jump, down+B/D) similar to Dhalsim, and her projectile (quarter-circle forward+A/C) is reminiscent of Quan Chi’s skulls. One thing’s for sure, she does not play like Olivia in any way. For starters, her dash is actually a teleport dash, similar to Demitri’s from Darkstalkers. Out of most of Odile’s normal attacks, most of her C and D attacks differ from Olivia’s. The overall play style differs greatly. Whereas Olivia centers her game around fundamentals with a combo starting command grab, Odile normally throws a fireball that she runs with or ahead of to rush down and poke the opponent, while working for overheads with drill kick. She tends to use the same chain crouching B to standing C into her C version of Arabesque (quarter-circle back+A/C) which the C version can be jump canceled so Odile can stay safe. Cabriole (quarter-circle back+B/D) works like a jumping attack that’s used to cross up the opponent, but it’s not really recommended. As for supers, Odile has two: one air super that essentially is a super drill kick (quarter-circle forward x2+B/D while jumping), and the second super is similar to Olivia’s Centifolia (quarter-circle back x2+A/C). Her super drill kick, known as Grand Pirouette, does tons of damage in the corner during combos. Once Odile has meter to activate Heat Up, her playstyle becomes a bit more tricky. Odile’s projectile becomes a huge skull that hits twice, something that’s quite useful in juggles. Her aerial movement gets buffed as she can now double jump. This feature is great because it not only works well with combos, but you can do interesting things like drill kick, double jump, drill kick, and continue to rush the opponent down. Odile can also use double jump to force an anti-air attack to whiff, and she can punish afterwards, preferably with her air super.
Playstyle – Ground based pokes that lead into air based mixups
*Pros*
- Has a full screen projectile
- Has reliable block strings
- Only character with a “dive kick” attack
- Generally safe in all attacks
*Cons*
- Can be predictable
- Heat Up doesn’t really benefit Odile too much
- In some ways she can be weaker than Olivia
- Only one real reliable super
- Damage proration kicks in during many combos involving j.236236+B/D
*Strategy*
- Odile is somewhat similar to Olivia, except their options after blockstrings vary significantly. Nevermind the fact that Odile has a projectile, and a teleporting dash, which can go past some items. Odile has a jump cancelling special. 214+C works wonders in her overall game. There’s the chip damage, there’s combo damage, block stun, etc. Odile is a rushdown character at heart. She appears to be a situational rushdown character. Her 236+A/C projectile allows her to close in on the opponent in a way that Cedric and other characters with projectiles cannot. She has attacks that can be jumped cancelled into; 6B, 5C and 2D on block are a few normals that come to mind right away. In Heat Up, her specials get powered up, but her main feature is the double jump. Odile can get really tricky with the double jump feature. Imagine doing a j.D, cancelling it with a j.2B drill kick, jump cancelling again, and then doing another drill kick, then going straight into a block string that can be jumped cancelled shortly after? It can be done in Heat Up with Odile. There’s going to be gaps in the rushdown, but jump cancels kind of make up for it. In terms of actual supers, 214214+A/C isn’t really recommended unless you’re punishing moves while standing/crouching. In terms of combos, you want to go for j.236236+B/D. The damage does prorate, but you get way more damage output from it.
This wraps up the primer for Battle Fantasia – Revised Edition. This game is easy to pick up and learn, and has tons of depth to be explored. Whether it’s situational setups, understanding how to increase effectiveness with Gachi, or understanding the match ups, you will find out that despite the game being out for nearly seven years, the game still has lots to offer, even in it’s newly tweaked form.
