
Disclaimer: If you find an error, or feel like you have more up-to-date or relevant information, please let us know. We’re able to update our current material after the fact, create addendums, and generally revise our process for greater accuracy and effectiveness, so don’t hesitate to tell us.
Written by heavymetalmixer
Match videos: http://www.meltydb.com/resultall.php?1c=vakiha&1m=Half&tdb=any&filt=any
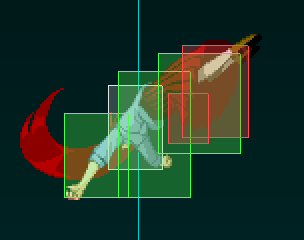
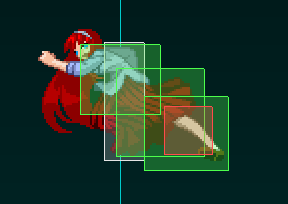
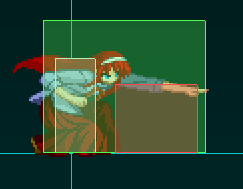
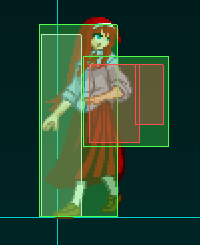
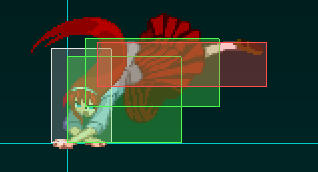
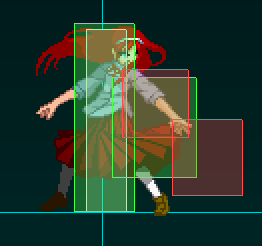
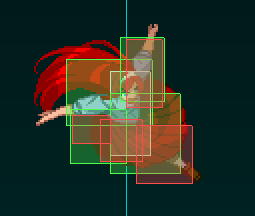
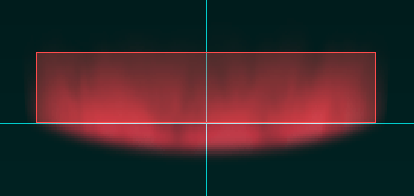
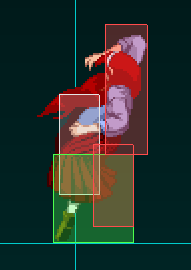
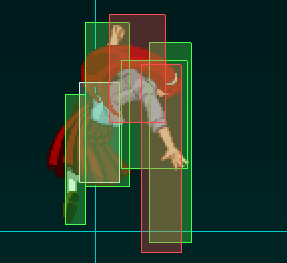
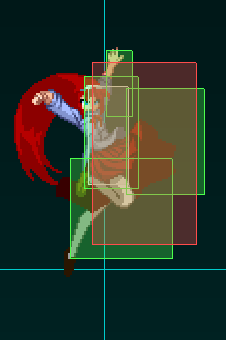
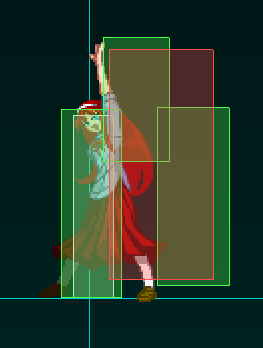
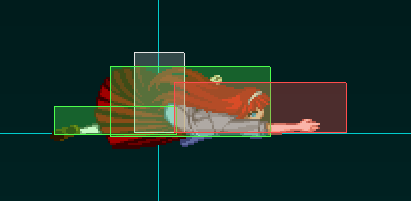
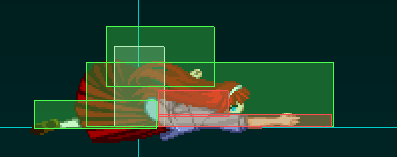
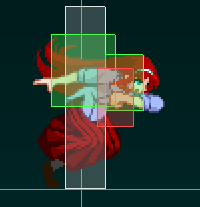
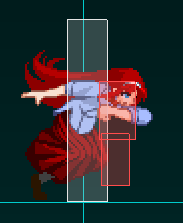
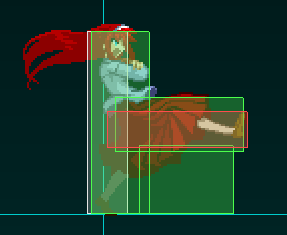
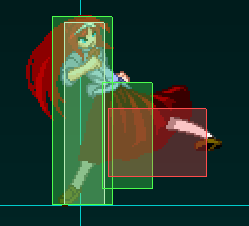
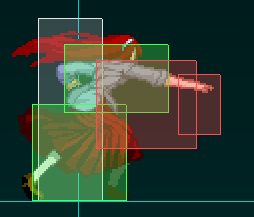
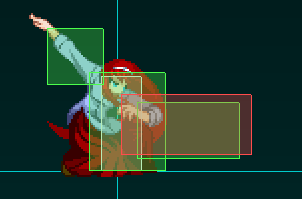
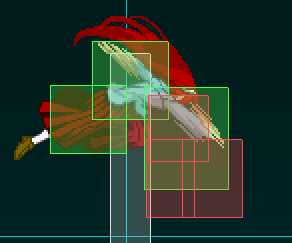
Non-projectile hitboxes: http://imgur.com/a/PFbkZ/all
Pros
Best speed and mobility in the game with a long distance dash, two jumps and two fast and long air dashes.
Good damage.
Excelent corner carry.
Good pressure.
Very good Okizeme with her air dashes and setups. Untechable knockdowns of almost everything (some better than others).
Very good character for Millia players in Guilty Gear.
Cons
Lowest life amount in the game.
Not very good range in the air.
Her zoning is slow.
Not very good meterless defense tools.
Needs good execution for the Momiji Loops.
Index
- Neutral
- Defense
- Offense
- Combos
- Setups
- Mixups
1. Neutral
Summary: Zone with j.A, j.B, 214A, 214B, j.22A and j.236A/B and abuse her air dashes to do j.C. Remember that in MBAACC air dashes and jumps count as different moves, so you can combine those four moves the way you like.
1.1 Essential
*j.B: Her longest reach air poke and due to it’s upwards angle is good for getting counter hits if the opponent is over H-V.Akiha.
*j.A: Short range but very fast and needed if the opponent is fast and mashes a lot up close.
*2A: A 5 frames low. Very good if you want to dash and mash something fast. Cancelable into everything and itself infinitely. Doing it twice lets you hit confirm easily into your combo of choice.
*5A: Same as 2A but is a mid that hits crouchers and a situational antiair.
*4C: Fast, two hits and very good range, but long recovery on whiff and block. One of her main tools for footsies and a situational antiair. In the ground it can be confirmed into a Momiji combo, or with an air combo if the opponent is airborne. Can be confirmed at max range into 5C > 2C > 623.

*2C: Low, has low profile, beats high shields, gives untechable knockdown and it has the best range of all H-V.Akiha’s normals, but with long recovery so it’s not good to use up close. On hit it knocks down and leads to IAD mixups, with or without a setup move such as: “pits” (22X and j.22X), fully charged “flame pillars” (214[A], 214[B]), “flame tongues” (236X) or “flame webs” (j.236X, also know as “flame orbs”). Can be continued with 2C > 623B to send the opponent closer to the corner, or 2C > 4C/5B delayed B for an air combo. It can also be used as an antiair for falling opponents.
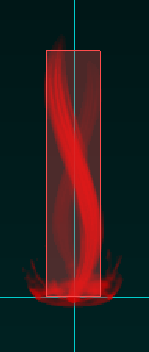
*Flame pillars (214X): A set of three pillars of fire appear in front of H-V.Akiha at a certain distance depending on the button pressed, with the A version being the closest and the B version starting from where the A version ends. Her fastest zoning tools and work as anti-airs due to their great vertical hitboxes. A and B versions can be fully charged to get 5 pillars with more distance in-between, but be careful because they have longer startup and recovery. C version is very slow and makes a wave of pillars in front of her (better just use A and B versions). The C version, when blocked on the ground, like with the A and B versions when fully charged, allows for pressure or mixups (not throws of course), and if it’s blocked in the air, you simply dash in and do an air unblockable 4C into an air combo, and if it’s shielded, jump and throw (also works if shielded on the ground).
*Mobility: Don’t forget about her godlike mobility with a long dash, two jumps and two long and fast air dashes to wreck every enemy attempt to lock you down.
*Air throws: Hard to do, but with a good untechable knockdown as reward (even the Momiji loops in the corner).
1.2 Important
*5C: Good range and beats low shields. Another of her main tools for footsies, but it sends the opponent flying to the corner and causes a wall bounce if airborne. Can be confirmed into a Momiji combo if the opponent is in the ground. Also a situational anti-air.
*5B: Good range (more than it looks), fast (if just tapped) and very safe (-1 on block). Better used to punish whiffed and very unsafe moves. Also a situational antiair.
*j.C: Fast overhead (10 frames) but small hitbox for a j.C. Better used on neutral to cross up your opponent while “flying around”.
*Pits (22X and j22X): Fire appears on the ground and hits three times at a certain distance. Has good horizontal hitbox but very poor vertically. Very long startup and recovery. The A version appears under H-V.Akiha and has the shortest startup and recovery, and the B version appears far away (more or less in the stage’s center). C version hits five times and has better hitbox both horizontally and vertically. On neutral it’s better to use only the air versions, mostly B. After the H-V.Akiha does the B or C pit she can do air dash to use a j.B or j.C to confirm it into fall > air combo or start doing pressure or mixups if blocked.
*623A: Another antiair. Good speed, two hits, gives an untechable knockdown and invincibility to overheads. The bad thing about this is that you can’t do a setup after it, and it’s recovery is big (unsafe on block).
*Flame webs (j.236X): An orb made of “fire threads” appears in front of H-V.Akiha and explodes after a long period of time. Long startup and recovery. Good for restricting your opponent’s movement in the air. A version stops H-V.Akiha’s momentum and makes her fall back, good to set in any moment or after and IABD, can also be Tiger Knee’d to make the orb appear almost on the ground. B version maintains H-V.Akiha’s momentum making it harder to use and has slower startup, the orbs appear closer to the ground than in A version, and if very close to the ground they just don’t appear at all. Trying to Tiger Knee the B version is useless: it makes the orb appear very high. But it’s still good if you’re high in the air, want to do an air dash or air back dash and want to put an orb without dealing with A’s long recovery. The C version is the same as A, but with bigger hitbox and damage and faster startup. Any version can only be confirmed if H-V.Akiha is close to the opponent.
 1.3 Extra
*2B: Fast, two hits, low profiles, and is active for 13 frames, but the vertical hitbox is the worst of all H-V.Akiha’s moves, has a lot of pushback and long recovery making it only usable in the neutral the same way you use 2A but worse.

*Flame tongues (236X): H-V.Akiha jumps and and horizontal flame appears under her. Very long startup and recovery. A version makes H-V.Akiha to fall in the same place she did it. B version sends her flying backwards and after it in the air, is possible to do anything in the air. C version makes a rain of flame tongues appear diagonally, has a minimum range to hit and allows H-V.Akiha to do pressure or mixups if blocked, the 4C air unblockable it’s also possible from it, but they’re to high for 4C to hit, you jump and pressure. If shielded on the ground or in the air it’s throwable. Only 236C us usable in neutral.

*41236C: Good for punishing at almost full screen.

—————————————————————————————————————————-
2. Defense
Summary: Her best defensive tools need meter, and a single error can make you lose the round because of her low amount of life. Be patient, don’t be scared of blocking a lot and just mash when you know there will be an opening. Also practice shielding a lot.
2.1 Essential
*Blocking: the most basic and useful way of defense. Better to block than to get hit, don’t get desperate when blocking.
*2A: “Melty Blood, land of the 2AAAAAAAAAAAAAAAAAA” really old joke but sometimes it’s true, 2A is usually the normal to mash out of pressure and mixups, and in the case of H-V.Akiha it has a little more range than 5A, but be careful of frametraps. And in really weird situations it can hit airborne opponents. Can be confirmed into anything.
*5A: Same as 2A, but better to mash for airborne opponents, so it’s very important to know air combos out of this.
*2B: Already described before, but in defense is when this little thing shines. Better horizontal hitbox than 2A, low profiles and just slower than 2/5A by one frame. It’s two hits and long active frames makes it a very good option to mash out of pressure and mixups if the opponent is on the ground, but is a little hard to confirm because of it’s pushback and the long recovery makes it dangerous to use if the opponent is in the air.
*4C: 8 frames of startup, but more range and way worse recovery than 5B. Usually your normal of choice to mash when not in range for 5B.
*Shield: Hard to get the timing because it has almost no active frames and can only be tapped, but it’s really important to learn when to use it as it can give H-V.Akiha her momentum back, and the round victory, mostly with predictable attacks. Remember that with strikes it automatically activates the Shield Counter working as a very good reversal. If you shield a projectile you must use 236D to get the Shield Counter. Depending if you do high or low shield, you get this: (a) High shield has 5BB’s animation and sends the opponent flying upwards for a ground techable knockdown that can be confirmed into a (low damage) combo; (b) low shield has 214D animation, low profiles a lot of things and gives an untechable knockdown and any kind of setup; air shield has the same animation as C-V.Akiha’s j.C and gives a groundbounce that can be confirmed into 5B, 2C or 4C. Remember that both 2As and 5As can be shielded high and low. Just be careful with “throw happy” opponents when trying to shield and that the Shield Counter can be blocked in certain situations.
*214D (when blocking): One of the two versions of the Shield Bunker, it costs 100 of meter but gives complete invincibility and almost a guaranteed hit that gives untechable knockdown and any kind of setup.

*Mobility: Sometimes is just better to get the hell out of there than trying to mash and her mobility makes it even easier. Don’t forget that MBAACC’s backdashes are very useful in some situations.
*Dodge (2E): Just like with the Shield, is very useful for changing the momentum if the opponent use predictable attacks, but is better to use it at mid and long range because it’s recovery can be mashed and thrown. Easier to use than Shield.
*214A: Given that it works as an antiair and is fast if not charged, sometimes is very good if the opponent tries an air approach or to reset pressure.
2.2 Important
*5B: A 9 frames mid (if just tapped) that can be moderately and fully charged. Good option if the opponent is out 2B’s range but still close, just -1 on block and hits airborne opponents so it’s good even they block it, and very good to punish unsafe stuff.
*2C: Low profiles some stuff, very good range and gives you the momentum back, but it’s recovery makes it hard to mash if they opponent sees it coming and jumps.
*214D (when not blocking): The other version of the Shield Bunker. It has no cost, low profiles a lot of things and it has some clash frames, but the amount of invincibility is very small so it’s only useful to get rid of some mixups, certain moves with no hitbox on the low part and blockstrings with gaps.
*j.A: Rising j.A works sometimes as an antiair.
*Momiji (623X): Her dragon punch series that can be used as decent reversals. 623A for dealing with high attacks and airborne opponents in general, 623B for lows and 623C for anything, though it’s amount of invincibility frames is very small.
623A/B/C:

2.3 Extra
*22A/j.22A: If you see the opponent coming and you think he’s gonna touch the ground, mostly if you’re in the air.
*Flame tongues (236X): 236A can evade lows but is very slow. 236B works as an IABD shielded with a flametongue. 236C works as a long length flame shield that works better if you see the opponent trying to get close through the air. Weirdly enough, 236A makes C/F-Nanaya 214B whiff.
*41236C: Good as reversal, but very unsafe on block, and given than you lose HEAT because of it, is better to not use it as possible.
—————————————————————————————————————————-
3.Offense
Summary: Her pressure and frametraps are really good, her Okizeme and lockdown are awesome too, just beware that her setups are really slow and that her air options to attack aren’t exactly good.
3.1 Essential
*2A: One of her three main pressure tools, and also her fastest low with 5 frames of startup. -1 on block means that is pretty good for frametraps and has a decent hitbox.
*5A: Her second main pressure tool. Also with 5 frames of startup, good for preventing jumps (mostly in the corner), and mixing it up with 2A, 5B, throws and IAD makes her pressure really unpredictable.
*Throws: Due to her fast and long dash, and walking after a good pressure, getting in for throwing is easy. Poor damage for a throw but it gives part of that damage to H-V.Akiha’s red and yellow life bar, and it gives an untechable knockdown with enough time to do and IAD mixup, meaty 236A, TK j.236C, 214A/B for baiting or just getting close to keep the pressure. Air throws don’t heal her back, but give her better rewards in terms of damage and knockdowns.
*5B: Her third main pressure tool. Good range, good speed, -1 on block and can be charged (+3 on block, 4 hits and her best damage starter if fully charged). Usually used to finish blockstrings, it makes awesome frametraps because it can be canceled into other moves very late and one of her best damage starters. It moves her forward a little and prevents jumps. Something weird about it is that gives untechable knockdown on crouchers, so if you wanna keep the best knockdown you can get better confirm it into 2C > 623B or just do a setup.
*2C: Besides the info already mentioned about it, it prevents jumps and is the most used normal for combing falling opponents, like after an air counter hit or a High Shield Counter, and is the only starter that allows the Momiji loop to be done if the first 623B hits only three times. Better used in pressure at max range or to wreck high shields. It prorates the combo damage a lot.
*5C: Another normal that prevents jumps, can be late canceled, good damage, moves her forward a little, beats low shields but is not safe on block. Her second slowest normal after 2C and in airborne opponents it can only be confirmed in the corner into 4C > air combo.
*4C: 8 frames of startup, good range, two hits, and being an antiair (somehow) makes this move awesome for pressure mostly at max range. Can be confirmed into 5C > Momiji combo (or loop in the corner).
*Flame tongues (214A and 214B): Both are very important for ending and resetting pressure depending on the distance and situation. 214A is 0 on block if the third pillar is blocked, so it can be used in blockstrings up close in the corner and then resetting pressure, same for 214B but due to it’s position, it’s reseting pressure possibilities are more limited (good to use 2C or 4C after it for preventing jumps, or 214B/A if you think the opponent will try to jump or get close).
*j.A: This move makes wonders in pressure and mixups as I’ll specify in the mixups section, even being a mid. Also very important in her air pressure.
*j.C: This move was made for offense, seriously. A 10 frames overhead that can be special, jump and air dash-canceled makes this move be vital in pressure and mixups, mostly because is her only air overhead that hits crouchers.
*623B: One on the Momiji series. The core of the Momiji midscreen combos and the Momiji corner loops. Four hits with good damage, good meter gain, excelent corner carry and and untechable floor bounce (her best untechable knockdown). Can be used once in simple Momiji combos, but in Momiji loops it can be used up to three times (if there wasn’t any wall bounce or floor bounce in the combo previously). You can do any kind of setup after it if close enough.
*Air dashes: Without her air dashes, her pressure but mostly her mixups wouldn’t be as good as they are. Learning to do IAD is fundamental for maintaining momentum and making her mixups more ambiguous.
*Pits (22X and j.22X): After 623B, is the best setup you can get at any distance. j.22A and j.22C are usually the best options, (j.22B is only for gimmicky pressure), but watch out for DPs and Shield Counters/Bunkers. Can even being used as pressure resets.
3.2 Important
*Flame tongues (236X): Good as A and B versions are her fastest setups, usually just for setting a meaty or corner-only pressure resets. C version must be use with enough space in the corner to not let the opponent scape, she can do a jump or an airdash so it works as a pressure reset/mixup setup. Is important to know that 236 offers a big frame advantage on block, and doing it meaty makes it makes the advantage even bigger, although still is not enough to be able to do a gapless 6C after it.
*Flame Webs (j.236X): Offers a good setup but only in the corner. The C version is fast enough to be done in Tiger Knee after a throw even in midscreen, but there’s still a gap that enables the opponent to jump away.
*2B: Good as part of H-V.Akiha’s frametraps because of it’s two hits and active frames, and for tech punishing. It’s proration is horrible and it has a lot of pushback.
*j.B: Not very good in the offense department because it doesn’t hit crouchers (unless the opponent is Nero, Hime or Wallachia). Still is an important move of her air pressure like j.A.
*6C (also known as “Imouto Kick”): H-V.Akiha walks with her arms crossed and kicks the opponent in the stomach. Her only standing overhead, very long startup and is only dash and special-cancelable on hit, but on block it’s pushback creates a lot of space making it safe. Sends the opponent flying to the corner causing a wall bounce (unless it’s the starter and it hits from the other corner). Necessary part of her full screen corner carry Momiji loops.
*5A6AA (or 6AAA): 5A6A just like 5B is good for pressure, mostly for it’s canceling possibilities and because it moves her forward a little. 5A6AA along with 6C is needed for the full screen corner carry Momiji loops.
3.3 Extra
*2BBB: 2B is a mid, 2BB is a low and 2BBB is a high, It’s not a good mixup because of how slow it is and it’s animation. If all the hits of 2B and 2BB connect, 2BBB won’t connect. 2BBB is jump-cancelable once even on block (after that jump H-V.Akiha still have her two air dashes available).
*5BB: Mainly a combo filler that has an auto-high-jump-cancel if you press and hold 8 (on hit only). Used starting air combos. It’s very unsafe on block and has a very small canceling window, but it can be used to prevent jumps when close to the opponent.
*214C: Another setup active for a lot of frames like 22C/j.22C and 236C, but it needs a lot of time to start, and if you try to use it up close the opponent can mash out of it.
—————————————————————————————————————————-
4. Combos
Notes: *If in the corner the first 623B hits only three times, then there’s no way to follow it, unless the starter was 2C.
*If you want a little more damage to with Momiji loops to finish the round, you can replace the last 623B with 41236C while in HEAT, or 5BB > j.c9 > j.BC > djc > j.BC > air throw (this doesn’t work if 6C was the starter).
*214[A/B] can be confirmed with dash > combo of preference.
4.1 Midscreen
*2/5A > 5C > 4C > 2C > 5BB > jc9 > j.AAC > djc > j.AC > air throw: Basic bnb for beginners, usable at max range. If H-V.Akiha is too low compared to the opponent, omit the last j.A.
*2A > 5C > 4C > 5A6AA > delayed 4C > 2C > 5BB > [8] auto-high jump > delayed j.BC > djc > j.C > air throw: Basix bnb for beginners up close with better damage. At medium distance just let the first 4C hit once.
*2/5A > 5C > 4C > 5B > 2C > 623B: Momiji simple combo, very good corner carry and the possibility to do a setup but lower damage than the basic bnb. Usually at max ranges when it’s not possible to do the full screen corner carry Momiji loop.
*2A > 5C > 4C > 5A6AA > 6C > dash cancel > 4C (close to the corner) > 2C > delayed 623B; delayed 4C > 2C > delayed 623B; delayed 4C > 2C > 623B: Full screen corner carry Momiji loop, one of the main advantages of H-V.Akiha over C-V.Akiha as it’s meterless. Depending on how much the opponent is close to the corner, after the dash cancel the 4C must be delayed (when the combo starts from the other corner) or immediately (since half of the stage). If H-V.Akiha is not very close to the opponent, is necessary to let the first 4C to hit just once.
*xxx > jc > j.AAC > djc > j.AC > air throw: basic air combo for situational antiairs like 5A or 4C. If H-V.Akiha is too low compared to the opponent, omit the last j.A.
*Air throw > (opponent touches the floor) 5A > delayed 2C > delayed 623B: Momiji combo from air throw. Possibility for a setup and good corner carry.
*6C > dash cancel > 4C (close to the corner) > 2C > delayed 623B; delayed 4C > 2C > delayed 623B; delayed 4C > 2C > 623B: Full screen corner carry Momiji loop as an overhead confirm.
*j.22B hits > air dash > j.B/j.C > fall > jc > j.AAC > djc > j.AC > air throw: air combo for a j.22B pit confirm. If H-V.Akiha is too low compared to the opponent, omit the last j.A. If you want to replace the j.B or j.C for a j.A, when you fall you must do 5AA and then jump.
*High Shield Counter > delayed 2C > 623B: High Shield Counter into setup.
*High Shield Counter > delayed 2C > 5BB > [8] auto-high jump > delayed j.BC > djc > j.C > air throw: High Shield Counter confirm for damage, useful for getting the opponent in the corner of H-V.Akiha is in the corner.
*xx > 6C > dash cancel > 4C (leaving a gap in the corner) > 2C > delayed j.9c > j.22A (very close to the ground). Half Momiji setup.
4.2 Corner
*2/5A > 5C > 4C > 5A6AA > delayed 4C > 2C > delayed 623B; delayed 4C > 2C > delayed 623B; delayed 4C > 2C > 623B: Momiji loop up close. If H-V.Akiha is not very close to the opponent, is necessary to let the first 4C to hit just once. Can be done from a little less than half of the stage (like the position from where the opponent is before the round starts). This one has the best meter gain of all her combos.
*2/5A > 5C > 4C > 5B > 2C > 623B; delayed 4C > 2C > delayed 623B; delayed 4C > 2C > 623B: Momiji loop at almost max range. Good after a j.B/j.C as starter and the best damage of all her combos.
*2/5A > 5C > 4C > 5B > 2C > 623B: Momiji corner combo at max range.
*j.22A hits > 5A > 5C > 4C > jc > j.AAC > djc > j.AC > air throw: air combo for a j.22A pit confirm. If H-V.Akiha is too low compared to the opponent, omit the last j.A. If the opponent is still too low add a 5B after the 4C.
*6C; delayed 2C > delayed 623B; delayed 4C > 2C > 623B: Standing overhead confirm into setup.Not very good damage but the better if the round is not gonna end soon.
*6C; delayed 2C > delayed 623B; delayed 4C > 2C > 5BB > [8] auto-high jump > delayed j.BC > djc > j.C > air throw: Standing overhead confirm for more damage.
*6C; delayed 2C > delayed j.9c > j.22A (very close to the ground).
*2A > 5C > 4C > 5A6AA > 6C; delayed 2C > delayed j.9c > j.22A (very close to the ground).
*2/5A > 5C > 4C > 2C > delayed 623B; delayed 4C > 2C > 2A whiff; delayed 5C; 2C > delayed j.9c > j.22A (very close to the ground).
—————————————————————————————————————————-
Setups
5.1 Midscreen
*2C: Any kind of setup. Remember than in MBAACC any normal can be jump-canceled (with some exceptions, 6C in our case).
*Throw: 236A and TK j.236C. TK9 j.22A can also be done but it has a big gap, so use it only if the opponent respects you.
*Ait throw (Raw): Any kind of setup. For pits and fully charged flame tongues do a little delay.
*623B: After connecting with 623B, do IAD > j.22A. Unless you got out from the other corner with a Momiji combo, this will carry them to the corner.
*Air throw (from combo): Nothing. 214A/B can be used to bait.
5.2 Corner
Here is where H-V.Akiha becomes a rushdown monster, because the Momiji loops always guarantees a setup after it.
*2C: Same as midscreen.
*Throw: Same as midscreen.
*Air Throw (Raw): Same as midscreen.
*623B: Any kind of setup. The most used are forward jump > j.22A close to the ground and back jump > j.22C. TK j.236A/C is also very good and specially good for baiting and punishing HEAT activations. Jump forward delayed > j.236A and jump forward > j.236B both at opponents head works for preventing jumps but need respect. 236A/B are as always good as meaties, 236A for keeping pressure and 236B for baiting most DPs.
*Air throw (from combo): Like in midscreen but a little better because it allows for easier pressure resets.
—————————————————————————————————————————-
6. Mixups
6.1 Midscreen
H-V.Akiha’s midscreen mixups are all about using her two air dashes to mixup up high/low, strike/throw and left/right, though the last one only works for reversing the opponent’s input because of the MBAACC’s Cross Up Protection. Assuming that H-V.Akiha is on the left side (facing right), the left/right variation depends on the two airdashes timing: IAD > delayed air back dash means right, IAD > air back dash means left. For high/low you can use j.C as overhead and j.B whiff > fall > 2A (omit the j.B on Nero, Hime and Wallachia) with any of the two left/right timings. The j.B whiff is an OS that makes the low a little harder to see and hits the opponent while trying to jump, though the j.B hitting only works if you plan to be on the left side. Notice that ground throws only allow mixups without setups. The setups that allows mixups are j.22X and TK j.236A. Something fun and weird about j.C mixups (it also happens in the corner) is that if H-V.Akiha crosses the opponent up with j.C and goes for another j.C with an air dash, the air dash won’t keep forward but auto-corrects her direction and goes towards the opponent.
6.2 Corner
H-V.Akiha loses the cross ups, but her high/low and pressure become stronger. Usually all her mixups in the corner are done after a setup, sometimes as pressure resets and need IAD to begin. The variations are these:
- a) j.A: It’s a mid but as j.C, is really important in her mixups. Given that it’s hitbox is on the down part is guaranteed that it hits crouchers, though it can only be confirmed into 2A if j.A is counter hit or the opponent is crouching. You can get up to three consecutive mixups with j.A if the opponent respects.
- j.A > fall > 2A: a frametrap to terrify normals mashers.
- j.A > fall and walk > throw: use it when the opponent respects. Beats shields.
- j.A > fall > 6C: useful when the opponent expects the 2A, use it when the opponent respects.
- j.A > fall > 2C: useful when the opponent wants to do high shield, use it when the opponent respects.
- j.A > IAD > j.C: useful when the opponent expects the 2A.
- j.A > djc > j.AA > mixup: It’s an OS that hits if the opponent tries to jump and whiffs if he activates HEAT. In this mixup, trying to the j.C variation needs a very well timed air dash, because IAD is not possible anymore.
- Also there’s the IAD > j.66 > mixup variant (for opponents used to the other variants, and to bait some DPs).
Even after the j.C variation, the four first variations can be made.
b) j.C: Starting with a fast overhead. Here is where we can say that H-V.Akiha has better mixups that C-V.Akiha, because you can get up to four consecutive mixups if the opponents is respecting. j.C allows for the same mixups j.A does, but the first variation with 2A needs a delay on the 2A to be a frametrap (is gapless), and j.C > IAD > j.A is a frametrap.
c) j.B: Same as j.C but faster and it only works on Nero, Hime and Wallachia.
d) j.A > j.B: It only works for standing opponents, good if you want to make the opponent think you’re gonna fall, but you do IAD > mixup. j.A > j.A works the same way, but with j.B is more ambiguous.
e) After 6C hits, it allows for the same IAD mixups than the throw does in midscreen.
f) Another kind of (gimmicky) mixup is the throw/strike with A Flame Web. After a good knockdown (2C, 623B) dash in do TK delayed j.236A, that way you can throw them with more damage thanks to j.236A but the opponent can mash out of it and the orb would disappear.
g) Half Momiji setup: After getting a good knockdown in the corner but leaving a gap behind the opponent, jump forwards and leave a j.22A pit very close to the ground (it leaves the opponent close to you). From here there are the next options:
- j.8 > j.C: High in the original side.
- j.8 > fall > 2A: Low in the original side.
- j.8 > fall > throw: throw in the original side
- j.8 > j.44 > j.C: High in the other side. Thanks to Cross Up protection it’s not a cross up, still is useful for confusing and messing the opponent’s inputs.
- j.8 > j.44 > fall > 2A: Low in the other side so it’s a cross up.
- j.8 > j.44 > fall > throw: A cross up into throw, mostly for trolling.
- 2E: Thanks to the way pit works in this setup, if you do Dodge, you will go through the opponent and get to the original side and keep the pressure/mixups. It’s useful for bating DPs too.
- Note: if the opponent gets burned by the pit (not blocking), confirm with j.AC > djc > j.C > Air throw.
