Disclaimer: If you find an error, or feel like you have more up-to-date or relevant information, please let us know. We’re able to update our current material after the fact, create addendums, and generally revise our process for greater accuracy and effectiveness, so don’t hesitate to tell us.
Written by Coren and goddamnpete
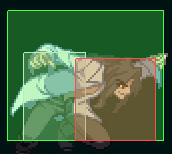
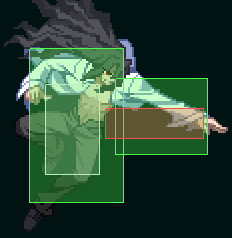
Hitboxes by @Bobo40k
Pros:
- Fast air and ground dashes
- Powerful air to ground game thanks to j.[C] and j.236X
- Easy, Damaging, Non-character specific Combos
- Meterless Hard-knockdown
- Damaging corner carry into hard knockdown for 1 EX
- insanely damaging Arcdrive combos
- Air unblockable specials
- Strong oki, reset, and tech-trap game.
Cons:
- Extremely linear pressure
- All normals and specials with advantage on block can be low shielded
- Weak and slow Anti-air options
- Loses air to air against most of the top tier characters
- Slow reversals are easy to safejump or shield OS
- Main shield bait (236[B]) loses to mashing
Key Combos:
Meterless hard knockdown into oki: 2A 2B 5C 6C xx 214A/B, 6C xx 214A
Meterless Damage: 2A 2B 5C 6C xx 214A/B, 6C j.BC dj.BC AT / air tech trap
1EX hard knockdown carry combo: 2A 2B 5C 6C xx 214A/B, 6C xx 214A, OTG 236C dashing 2C 6C 214A
1EX Damage carry combo: 2A 2B 5C 6C xx 214A/B, 6C 214A, OTG 236C dashing 2C 6C 236A j.BC dj.BC AT / air tech trap
Arc Drive mixup: 2A 2B 5C 6C xx 214A/B, 6C xx 214A, OTG 41236C
Arc Drive Damage 2A 2B 5C 6C xx 41236C, 2C 6C 236A j.ABC dj.ABC AT
Pressure:
F-Roa’s pressure is one of the weakest attributes of the character. F-Roa as a character is one that leverages risk and reward when trying to open someone up.
You have one blockstring that is completely safe (2A 5B 2B 5C 214A/B|236A/B), after using it you are forced to either reset pressure or back off.
You can end blockstrings in either 236B or 214A/B (depending on spacing.) Avoid using 6C in blockstrings because it will sometimes whiff on crouchers, leaving you wide open. The second hit of 5C can be cancelled with 214A/B or 236A/B if you feel like the second hit of 5C is going to whiff. That being said, 5C should be rarely used in pressure if ever. You mainly want to stick to 5A, 2A, 5B, 2B, and sometimes 2C.
214A/B leaves you and your opponent at a neutral position (i.e. it doesn’t let you continue pressure)
236B is a natural frametrap and can catch people mashing. If you counterhit them, you can get a free combo, if they block it, you’re left at neutral. 236B 2A is a fast frametrap that will catch any mashing and is F-Roa’s primary pressure reset tool. F-Roa’s weakness in pressure comes from the fact that 236B can easily be shielded or dodged on reaction for a punish. To try and bait dodge and shield you can use 236[B] which loses to mashing but causes shield and dodge to whiff or 236A which is a seamless string, but is slightly minus on block and ends your pressure. Once you have the opponent afraid to mash out you can go for 236[B] crossups or tick throw setup, or go for 5B tk.j236A strings which leave you with advantage and the ability to either double jump into an IAD j.[C] mixup or land and reset pressure or go for 2A / throw.
Typical blockstrings would look something like 5B 2B 214A, 2B 214A or 2AA 5B 5B. Try experimenting on the training mode dummy to familiarize yourself with Roa’s normals and get a feel for applying general pressure.
F-Roa’s extremely fast air dash is also useful for pressuring with deceptively low double overheads. 29 j.C 66j.C is a very powerful tool when used with j.[C] faints to keep your opponent guessing on a jump in. You can also cancel j.A/B/C into j.236A/B/C for another level of mixup. If you input a j.236A close enough to the ground you can cancel the move and continue pressure.
Staggering normals is extremely important as well as randomly redashing and IADing between plus on-block normals. Your goal is to overwhelm your opponent with your rapid and random movement.
2aa 66(redash) 2aa5b2b 29 j.C 66 j.C 214A
Neutral:
Control the air with jB for air to air and jC for air to ground
Make full use of your speedy 66 IAD to clear the distance and surprise your opponent
Do j.[C] until they make you stop. Full charge j.[C] is extremely strong and will stuff out and CH most other buttons in the game. j.B is your primary tool for dealing with opponents above you in air to air, j.C is best used for opponents below you, and j.A is for fast twitch close range air battles and opponents at the same height as you.
Roa’s ground dash is extremely fast and can close short distances in a flash. Dashing 2C is an effective way to close space on the ground while attacking with a strong normal. Dash 2A can punish a number of whiffed moves from a surprising distance.
Roa’s Airdash is one of the faster in the game, and IAD j.C is great tool for starting an offensive, you can even mix it up with j.[C] empty IADs to surprise them with a high/low from out of nowhere. Roa’s air backdash j.B good tool for snagging an air CH in an air to air battle.
Okizeme:
F-Roa is a mixup centric character, and so it is very important to understand the flow of his mixup game. F-Roa’s Okizeme game centers around his j.[C]. In Melty Blood when you use a normal during an airdash, the airdash ends and the character starts to fall with their current horizontal speed. By using j.[C] during an instant airdash roa can choose when to release the j.C or to hold it until landing for an empty airdash with the same animation, which allows him to time ambiguous high j.C and low 2A with the same timing. Any combo ending in 214A knockdown can be followed up with backjump IAD j.[C] (7~6A+B~1[C]) which allows you to perform this mixup with timing that will safejump slower reversals. Once they begin to respect this setup you can add in empty IAD into throw and (9~A+B~[C]) empty IAD which will land on the other side of their body and allow you to do a crossup 2A, but this setup can be mashed. F-Roa’s other main mixup tool is 236[B], which passes through bodies and allows you to do corpse crossups, however 236[B] crossup, 2A is easy to see with true meaty timing and can be mashed, but an EARLY fake Crossup with 236[B] IS meaty, and cannot be mashed.
Post Arc Drive, F-Roa has all his regular mixup options, but has much more time to setup, allowing for midscreen sandoori setups, double 236[B] setups which ARE meaty, crossup j.236 setups or neutral jump air steer mixups.
F-Roa’s 214C EX is completely Air Unblockable and has infinite height, this allows him to tack on a few thousand damage to any opponent who is foolish enough to airtech an air combo that ends in the corner. This can be setup by ending a corner air combo with j.236. Roa also has very strong tools for catching ground techs, His 5C and 2C will catch all neutral and back techs with the same timing midscreen, and ALL ground techs in the corner. You can follow any groundtech punish with a full 214A combo and put them back into a mixup situation.
Useful Links:
https://youtu.be/LPjAiGnoC64 – F-Roa Basics by TexasTim
https://youtu.be/93XUyyBZxUs – F-Roa Oki and Mixups by TexasTim
http://www.meltydb.com/searchplayer.php?player=uhonge&tdb=any – Matches from JP Player “Uhonge”, the only JP player to main F-Roa
http://meltydb.com/searchplayer.php?player=%E3%81%82%E3%82%8F%E3%82%8C&tdb=any&char=Roa – Matches from “Aware”, a Hisui player usually but his matches showcase some of the advanced combos and pressure F-Roa has.


